How to create online business directories in WordPress? (Step by Step Guide)
Creating a directory website has become a lot easier using WordPress due to the availability of a large number of WordPress business directory plugins. These plugins contain many powerful features and cool templates to create fully-functional directories in minutes. Moreover, with the available customization options, you can customize your directory and stunningly display them.
Here, in this article, we will be using Everest Business Directory – a premium WordPress directory plugin by AccessPress Themes to show you a step-by-step tutorial to create online business directories on your WordPress website.
Everest Business Directory: Brief Introduction
Everest Business Directory is a highly-rated WordPress business directory plugin. It consists of powerful features, cool designs, and user-friendly customization options to create highly interactive and engaging directories on your WordPress website.
Some of the Major Features of the Everest Business Directory
- Multiple Directory Listings Templates with List, Grid, and Map Views
- Advanced Search Form with 5 Predesigned Templates
- Highly Customizable and Configurable Frontend Submission Form
- Advanced Frontend Dashboard to Edit and Delete Directories
- Integrated with Advanced Google Maps for Directory Listings
- Selection of Directory Address Directly from the Google Map
- Unlimited Custom Field for Directory Submission Forms or Directory Listings
- Inbuilt Login Forms for Directory Submission and Directory Dashboard
Check out the Full Features Everest Business Directory
Installation and Activation
Buy Everest Business Directory from the CodeCanyon marketplace at a discount price of $10. (Since AccessPress Themes have launched 70% off for its promotional sale offer. To know more about the offer, check out the article: Offering 70% free discount offer in Everest Business Directory – A Complete Business Directory WordPress Plugin.

After you have purchased the plugin, install it and then activate it. The installation of Everest Business Directory is similar to other WP plugins. So, if you have any difficulty regarding the installation then, you can take the help of its documentation or go through the article: How to install a new plugin in WordPress website?
Create Business Directories in your WordPress Website using Everest Business Directory Plugin
After the plugin is successfully installed and activated, you will see “directories” tabs appearing on the left menu of your WordPress dashboard. Click on it.
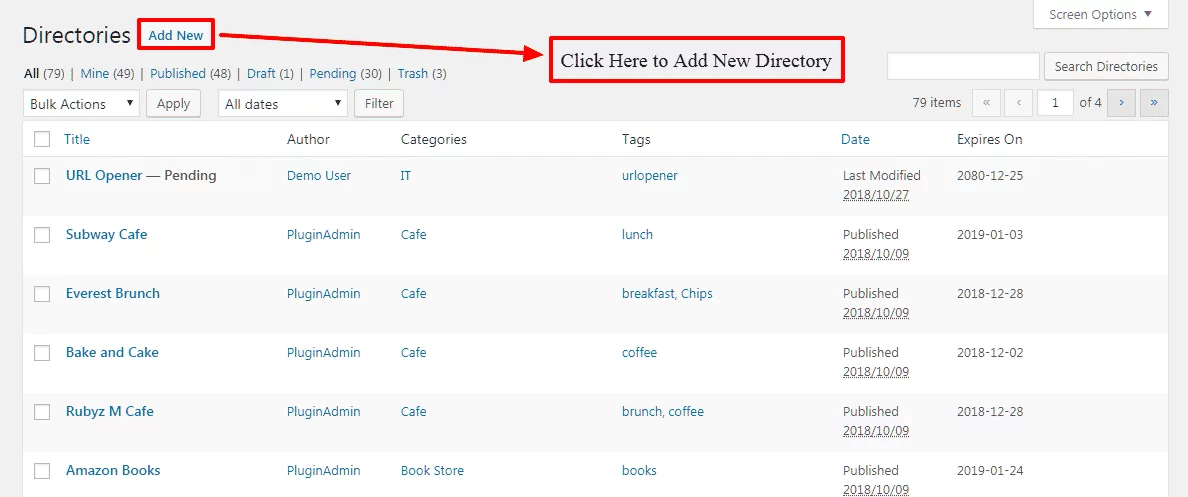
You will land on the all directories page. It contains the list of all directories of your WordPress website. To add a new directory, click on add new button.
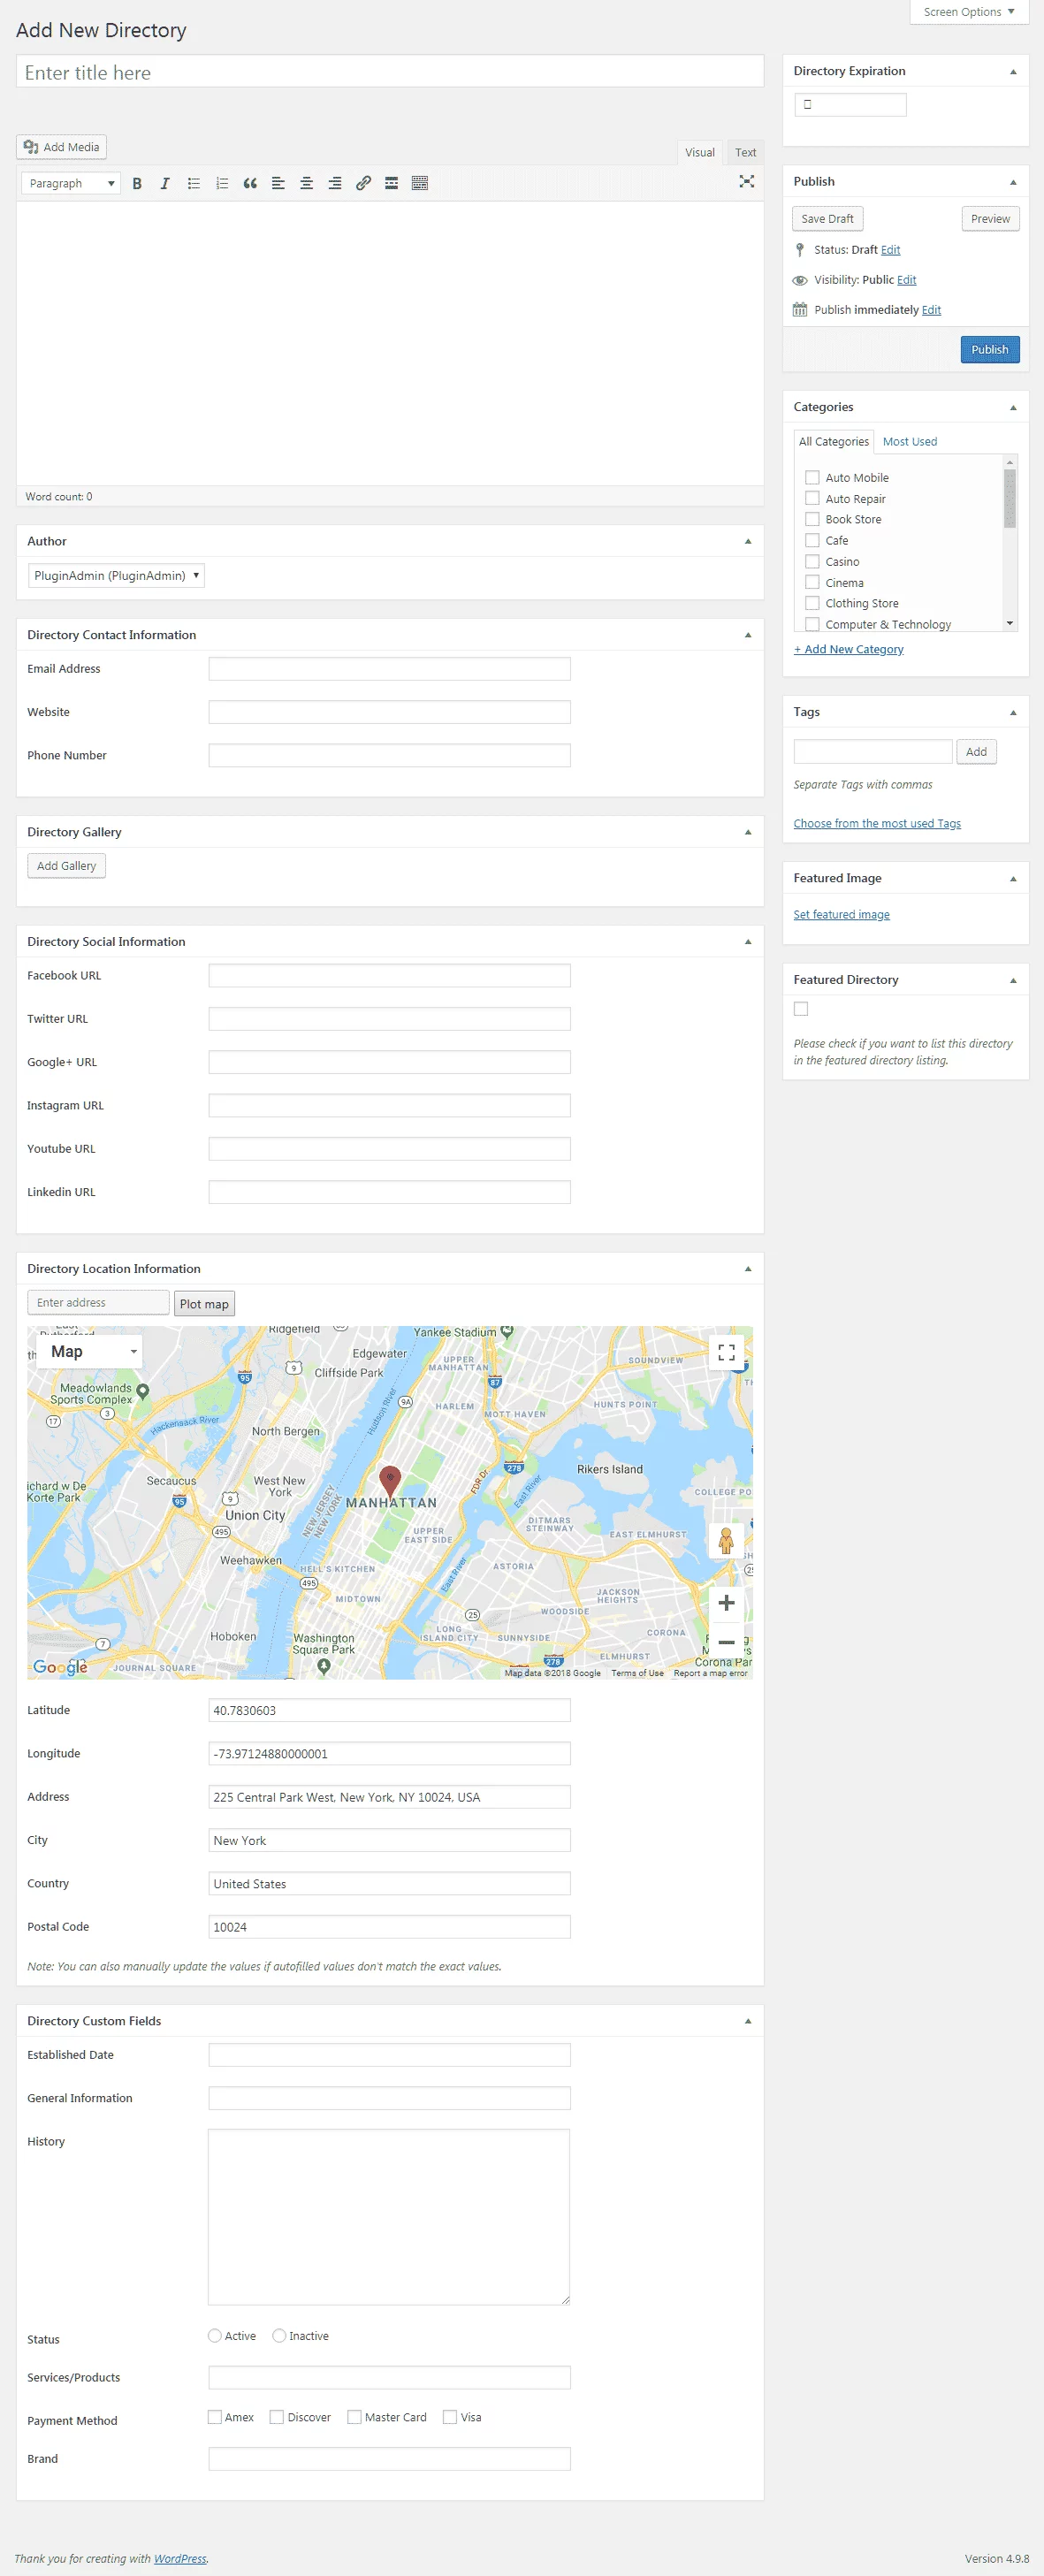
It will land you on to Add New Directory page. Enter the title and contents of your new directory. Then, set the directory expiry date, category, tags, and featured image for your new directory. Also, add the contact information, social information, and location. After everything is done press the publish button to publish your directory.
Once your directory is published, it will appear on the list of all directories page.
Categories
The categories section will let you add and organize your directories into different categories. It will help your audience easily find the directory that they are looking for.
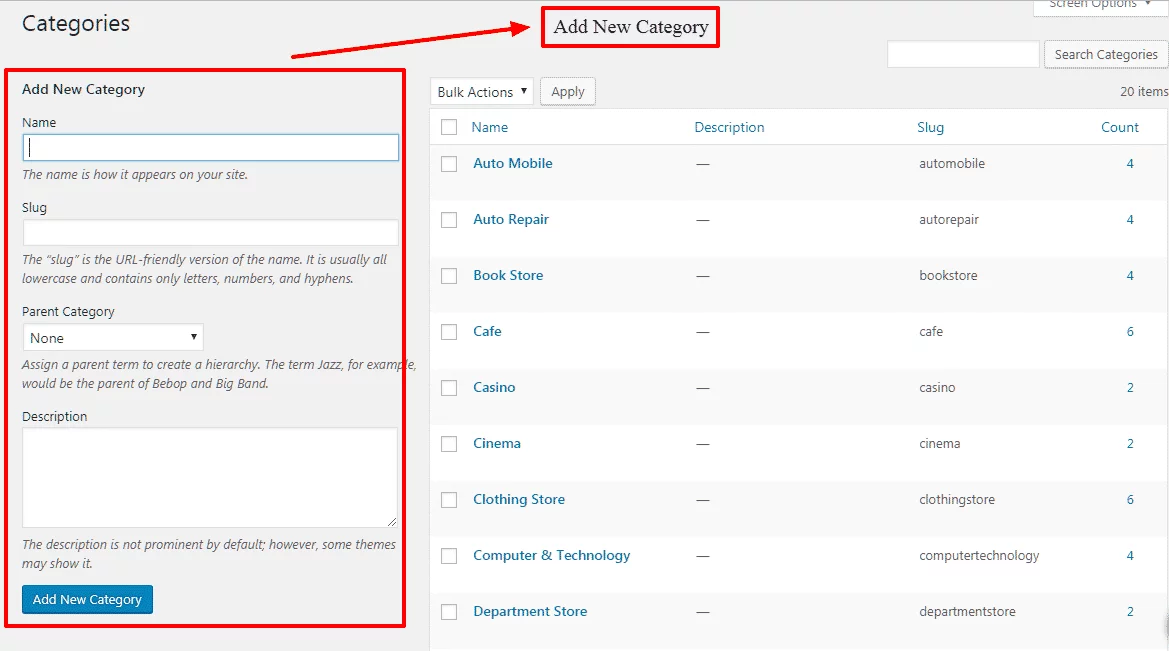
To create a new category fill up the “Add New Category” form by adding the name, slug, and description for your new category. Also, assign the parent category for your new category if there is any.
To mutually learn how to organize your categories you can check out the article: How to organize your WordPress posts into categories
Tags
In the tags section will you add tags for your directories? Assigning tags on your directories will allow the search engines to crawl your directory with LSI keywords and display them in the relevant search results.’
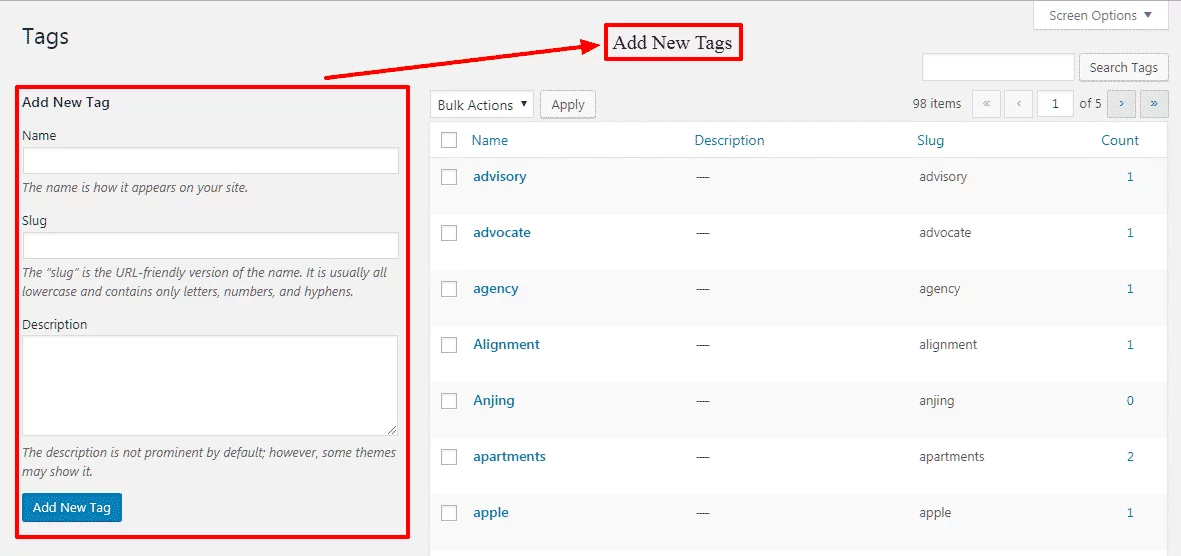
To add new tags for your directories fill up the “Add New Tags” form by adding the name, slug, and description.
If you want to learn more about creating and adding new categories and tags then, you can check out the article: How to add tags and categories in WordPress posts?
Settings
The settings page contains all the configuration and customization options of the Everest Business Directory Plugin. You can configure and customize everything from here such as submission form, and listings.
It consists of 6 different sections that contain an individual set of settings. They are:
General Settings
In the general settings, you can select the page where you want to place your directory listing and directory dashboard. Select any page of your WordPress website where you want to add the listings. Also, set the number of listing you want to display on each page. The default number of the list per page is 10 but you can change it to any number.
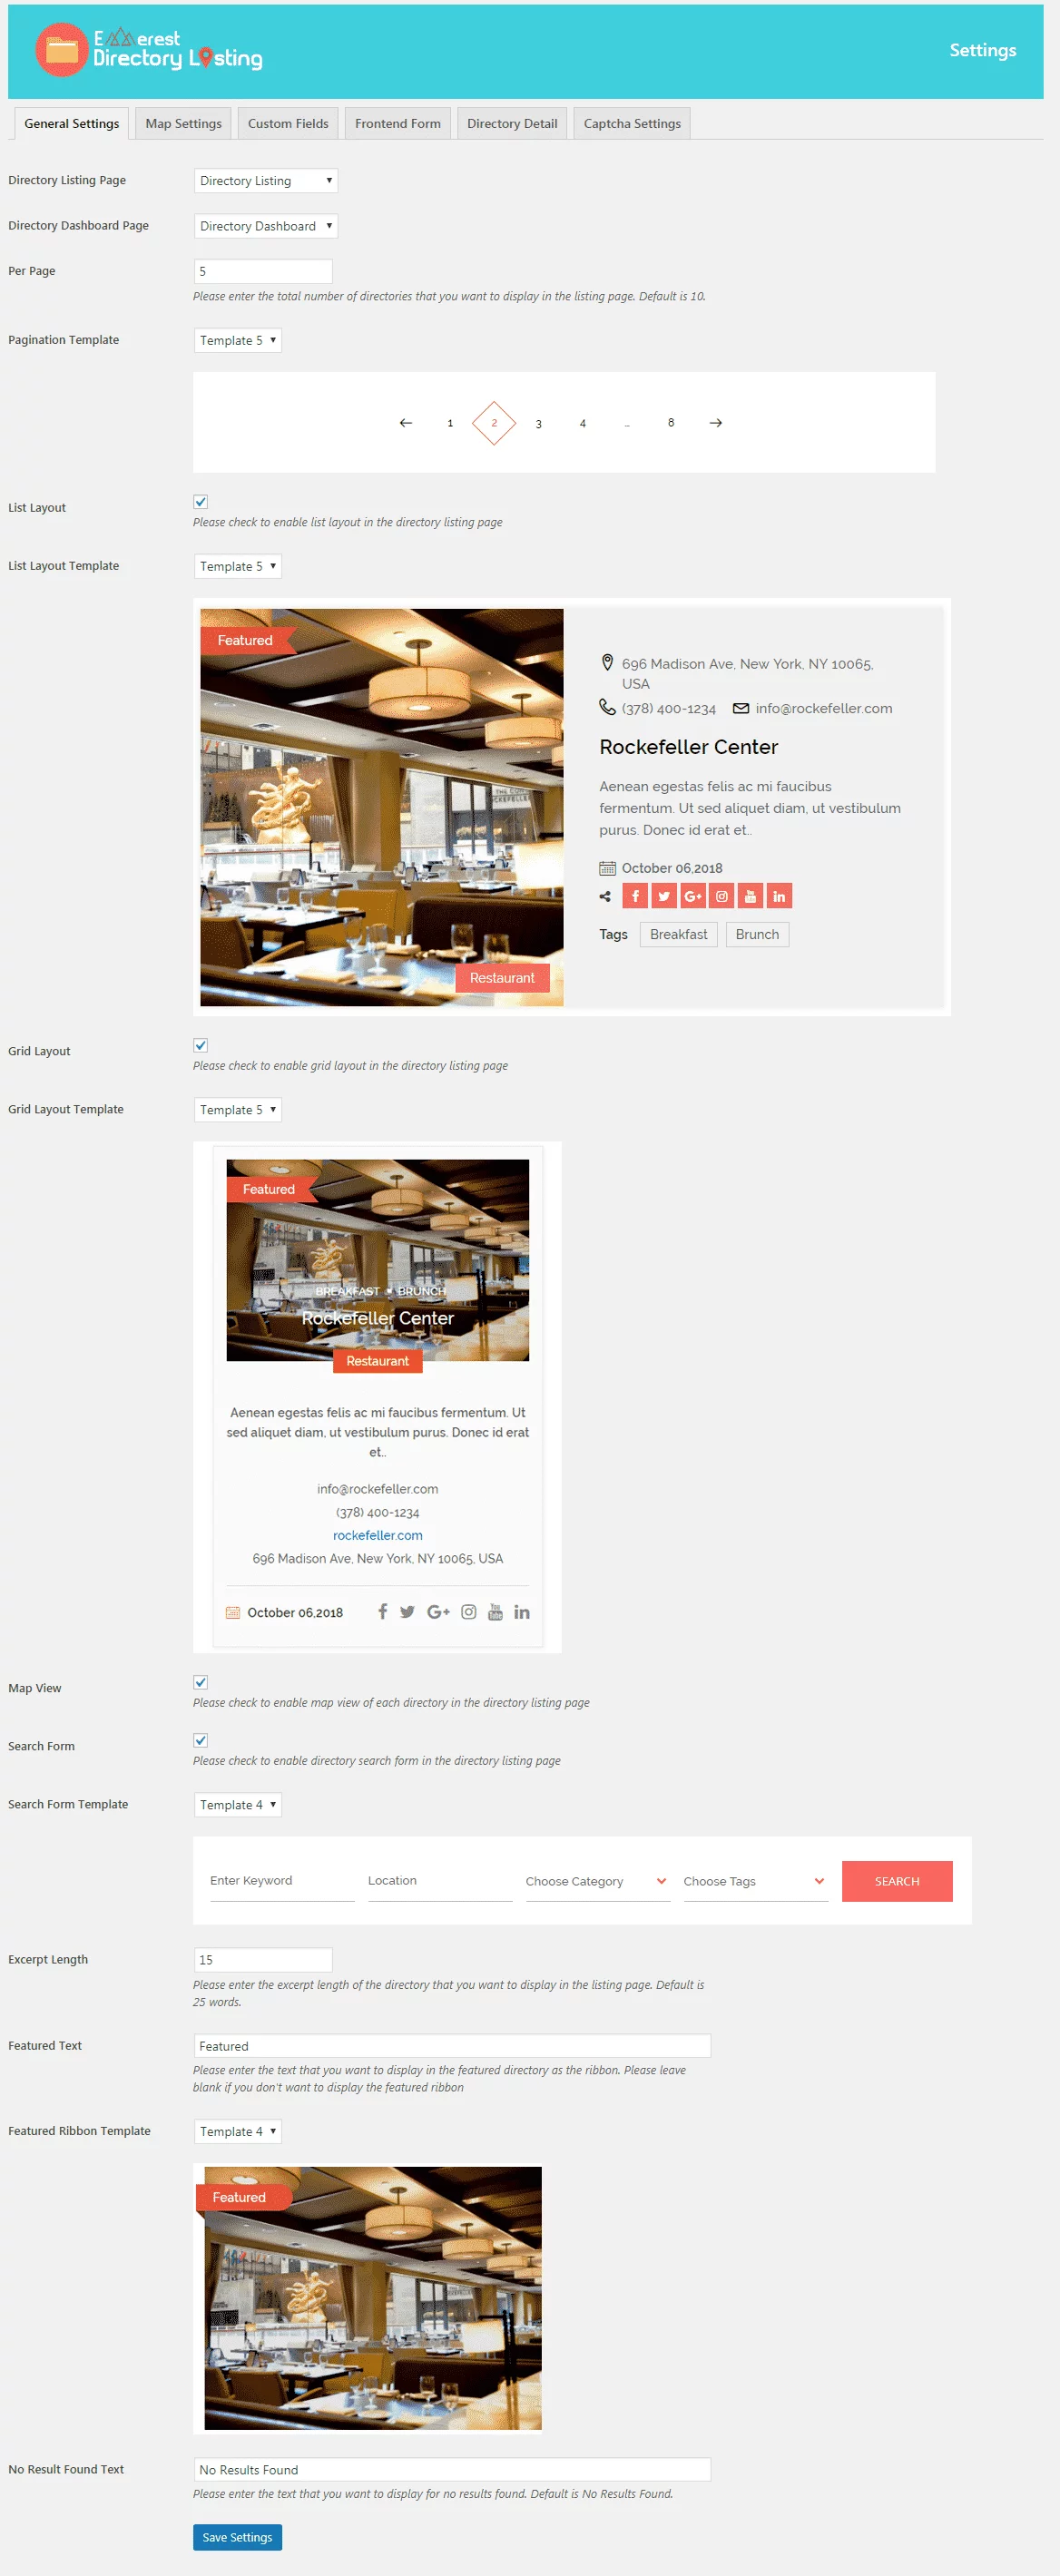
This section also consists of templates for directory layouts (grid and list), paginations, search forms, and ribbons. Just enable them and choose the templates. Moreover, you can also enable the map view from this page.
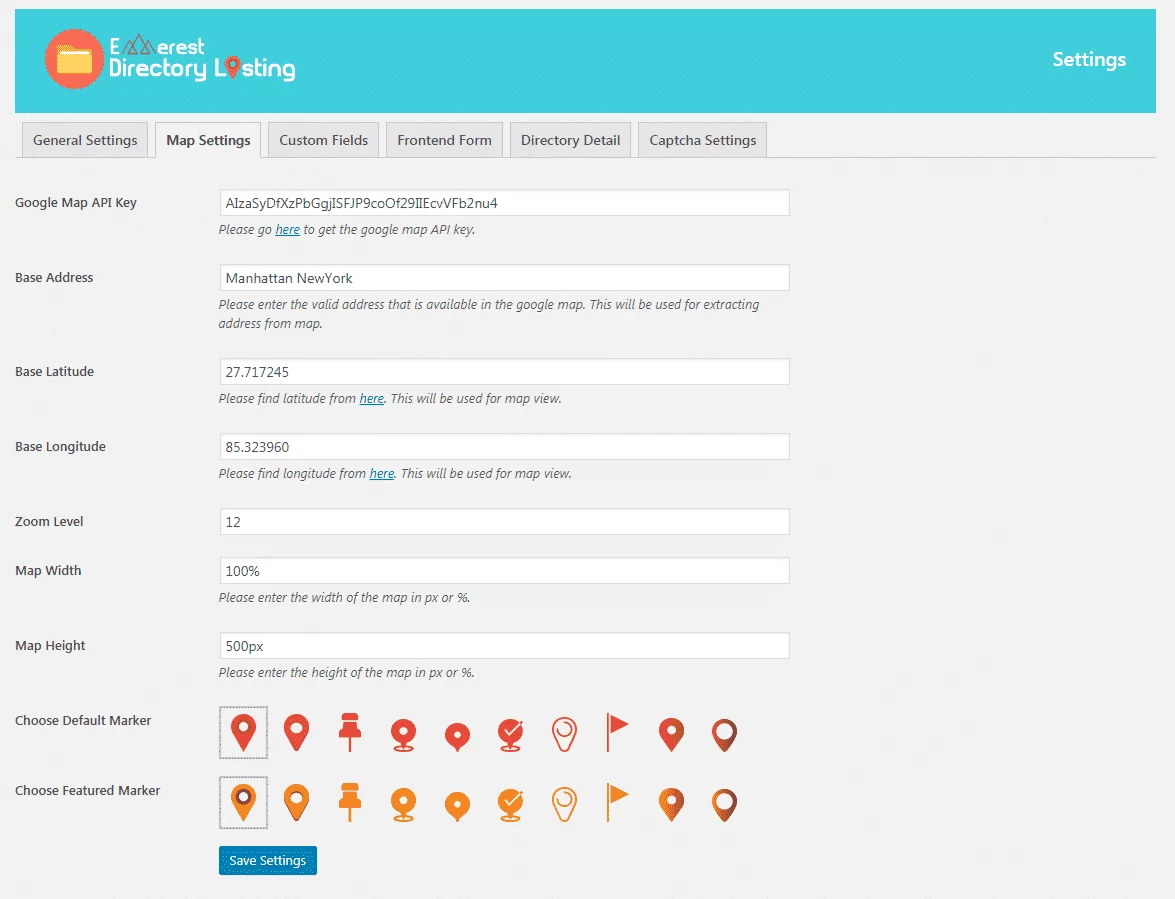
Map Settings
The map settings will let you assign the location of your business directory. To add the location, generate the API key by creating the project from Google Developer Console. Then, set the base address, latitude, and longitude. Longitude and latitude can be added from latlong.net. After that, assign the zoom level, width, and height of your map. Then finally, select the marker (default and featured) for marking your business location on the Google map.
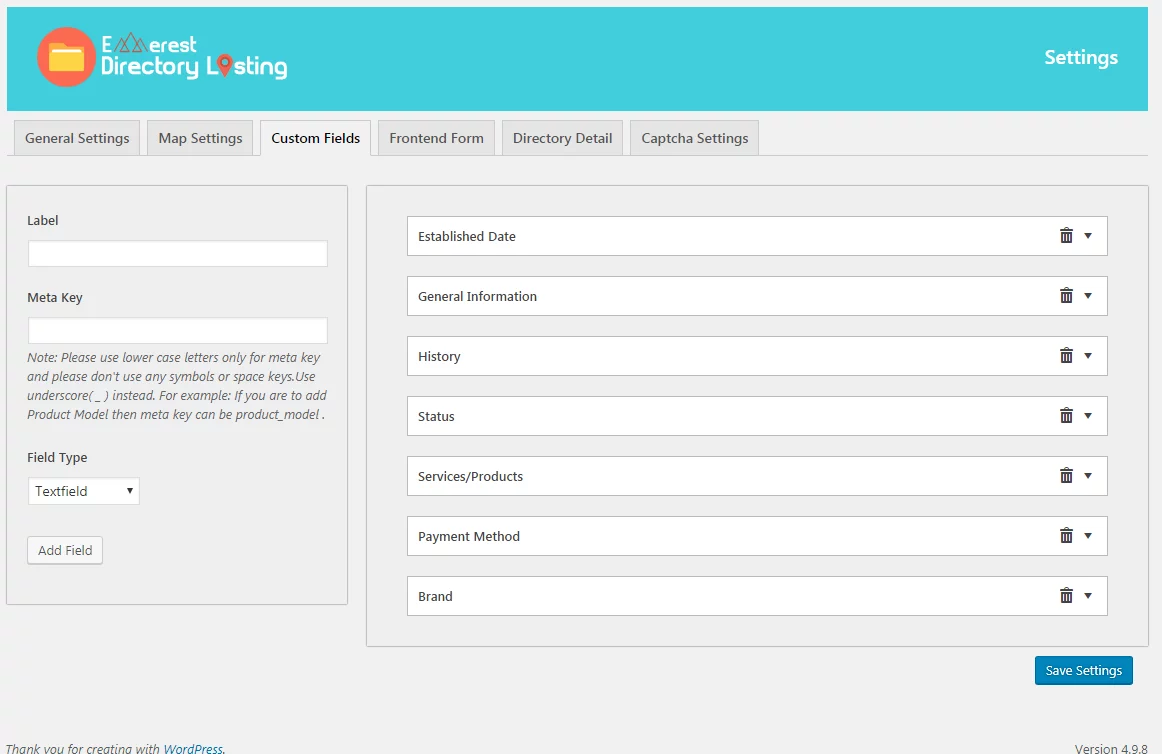
Custom Field
From the custom field, you can add extra fields for your directory submission forms and directory listings. Create and add as many numbers of custom fields on your directory listings and directory submission form.
Frontend Form
The frontend form section contains all the configuration and customization options for your frontend directory submission form. It is divided into 4 sub-settings. They are:
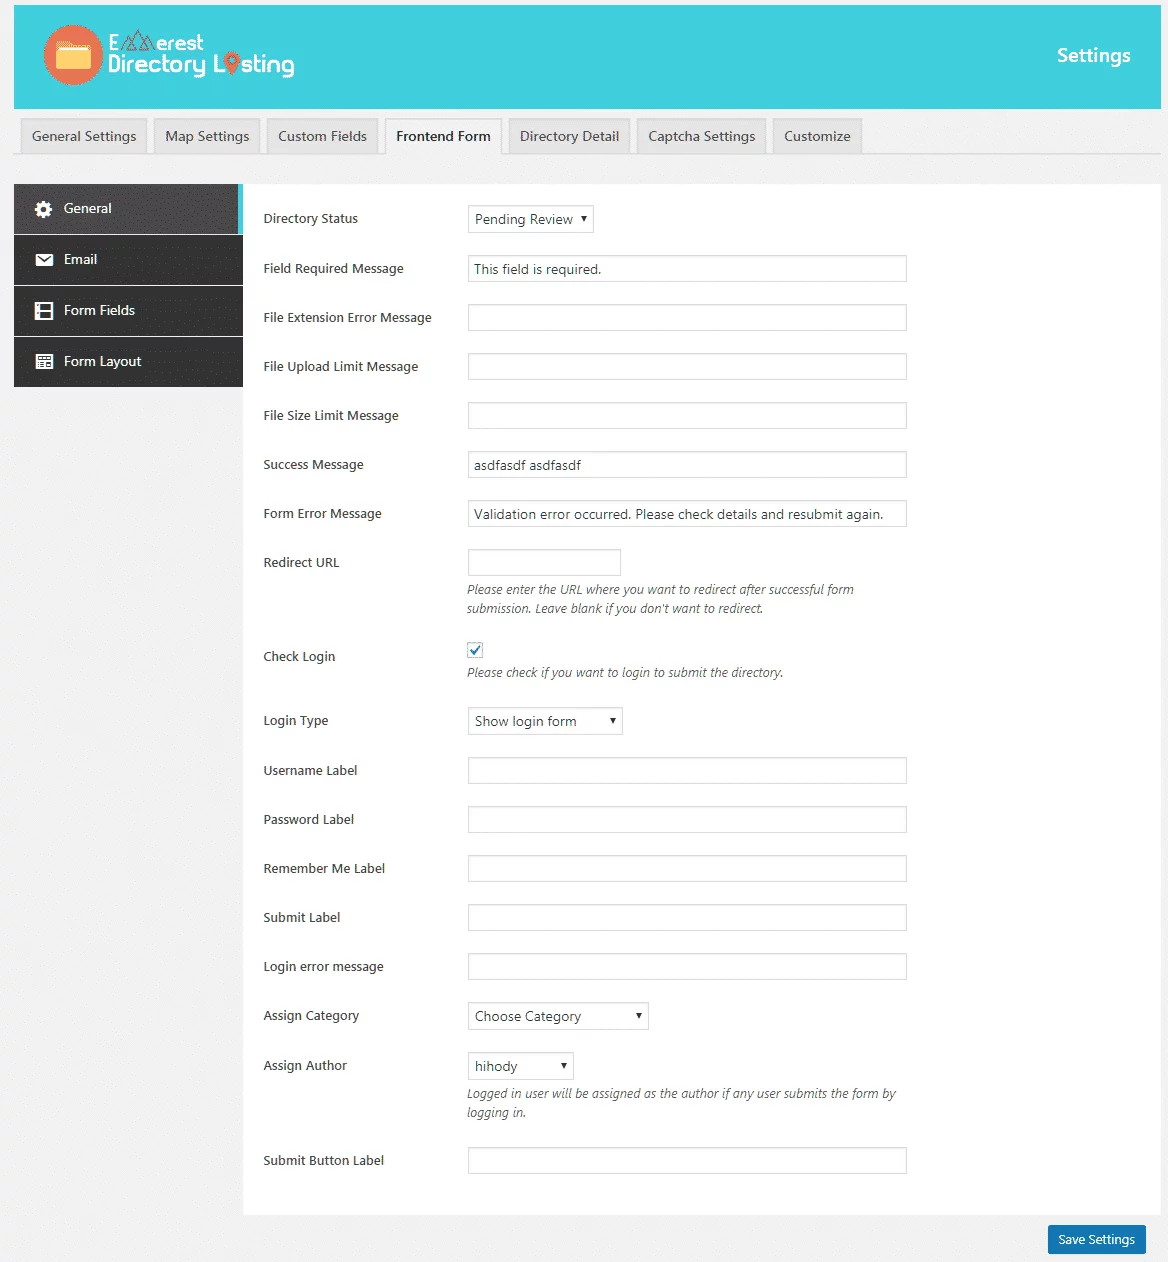
General
On the general sub-settings, you can choose the status for your submitted directory and set the custom message for the field required, file extension error, file upload limit, file size limit, success, and form error. Also, set the custom redirect URL to direct your audience after they have successfully submitted the form.
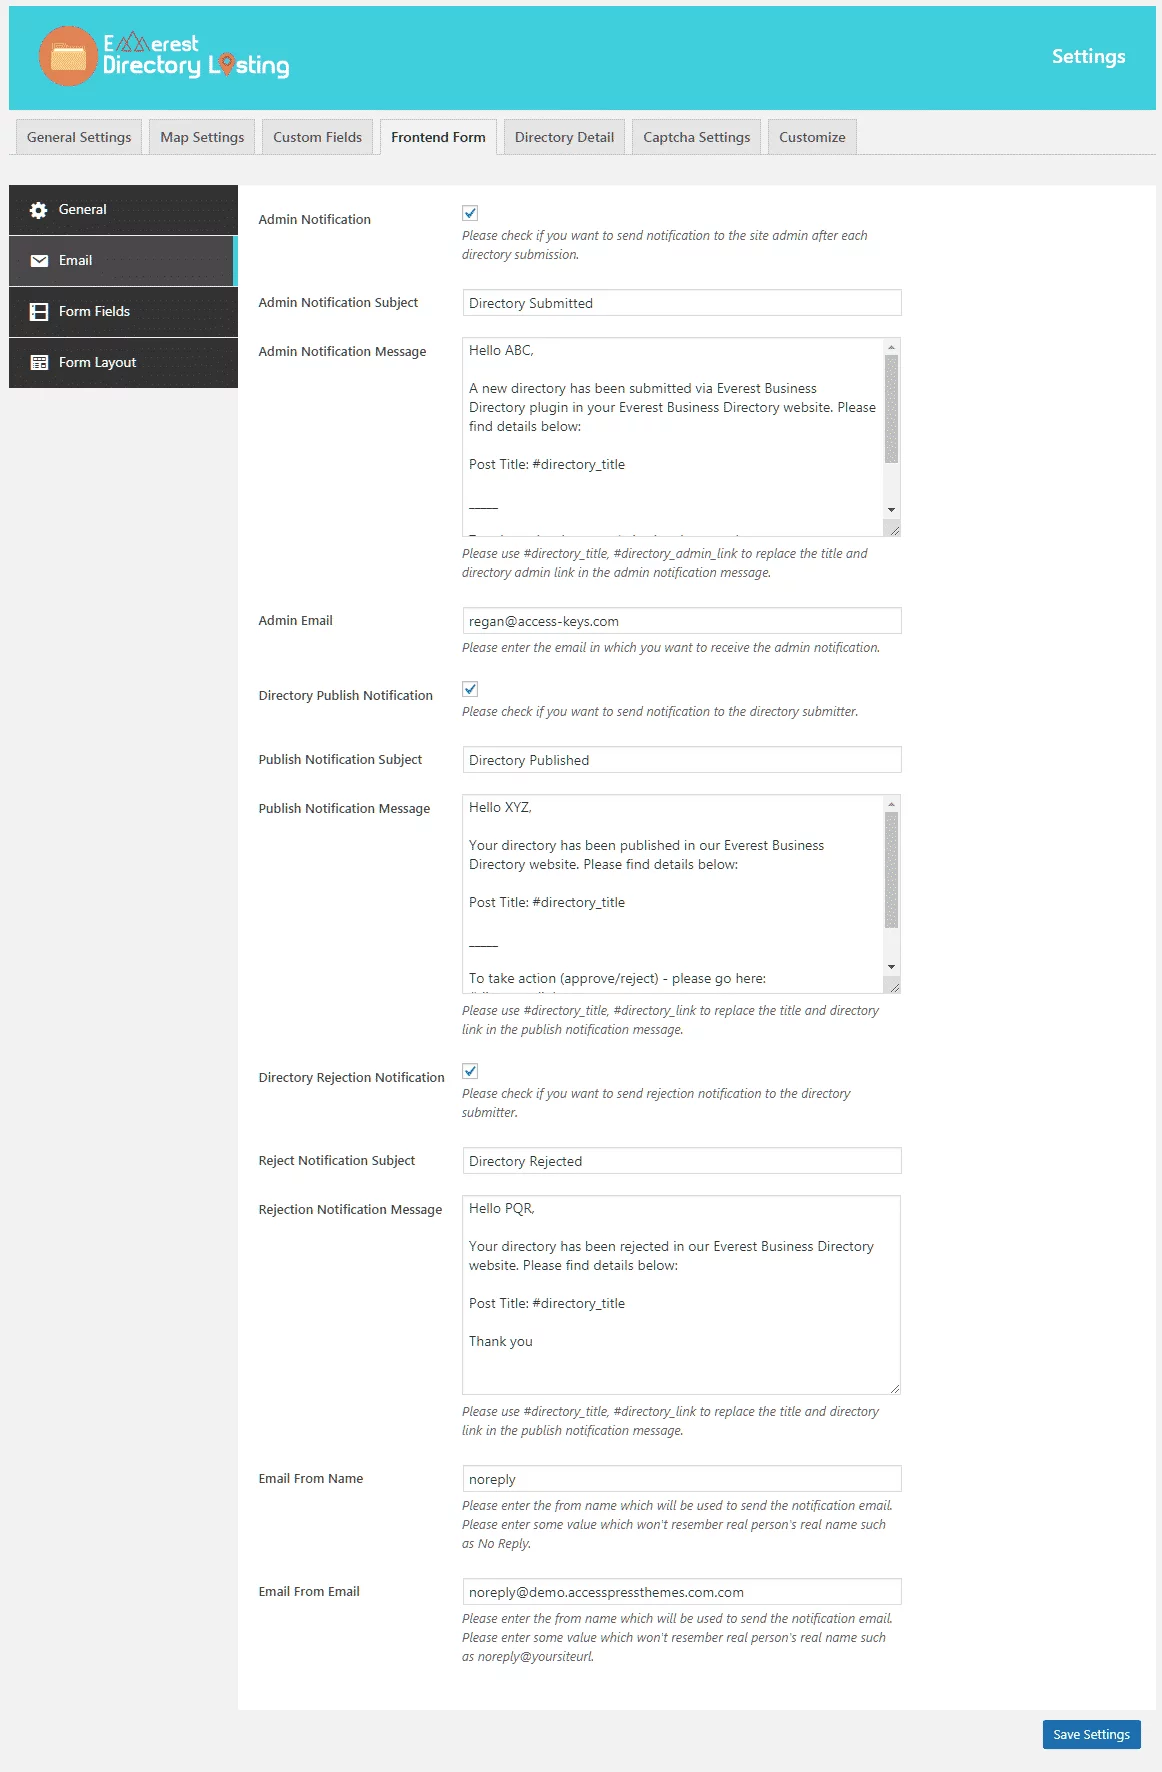
This subsetting will allow you to configure the notifications for all the directory submissions, directory publishes, and directory rejections along with custom subjects and messages.
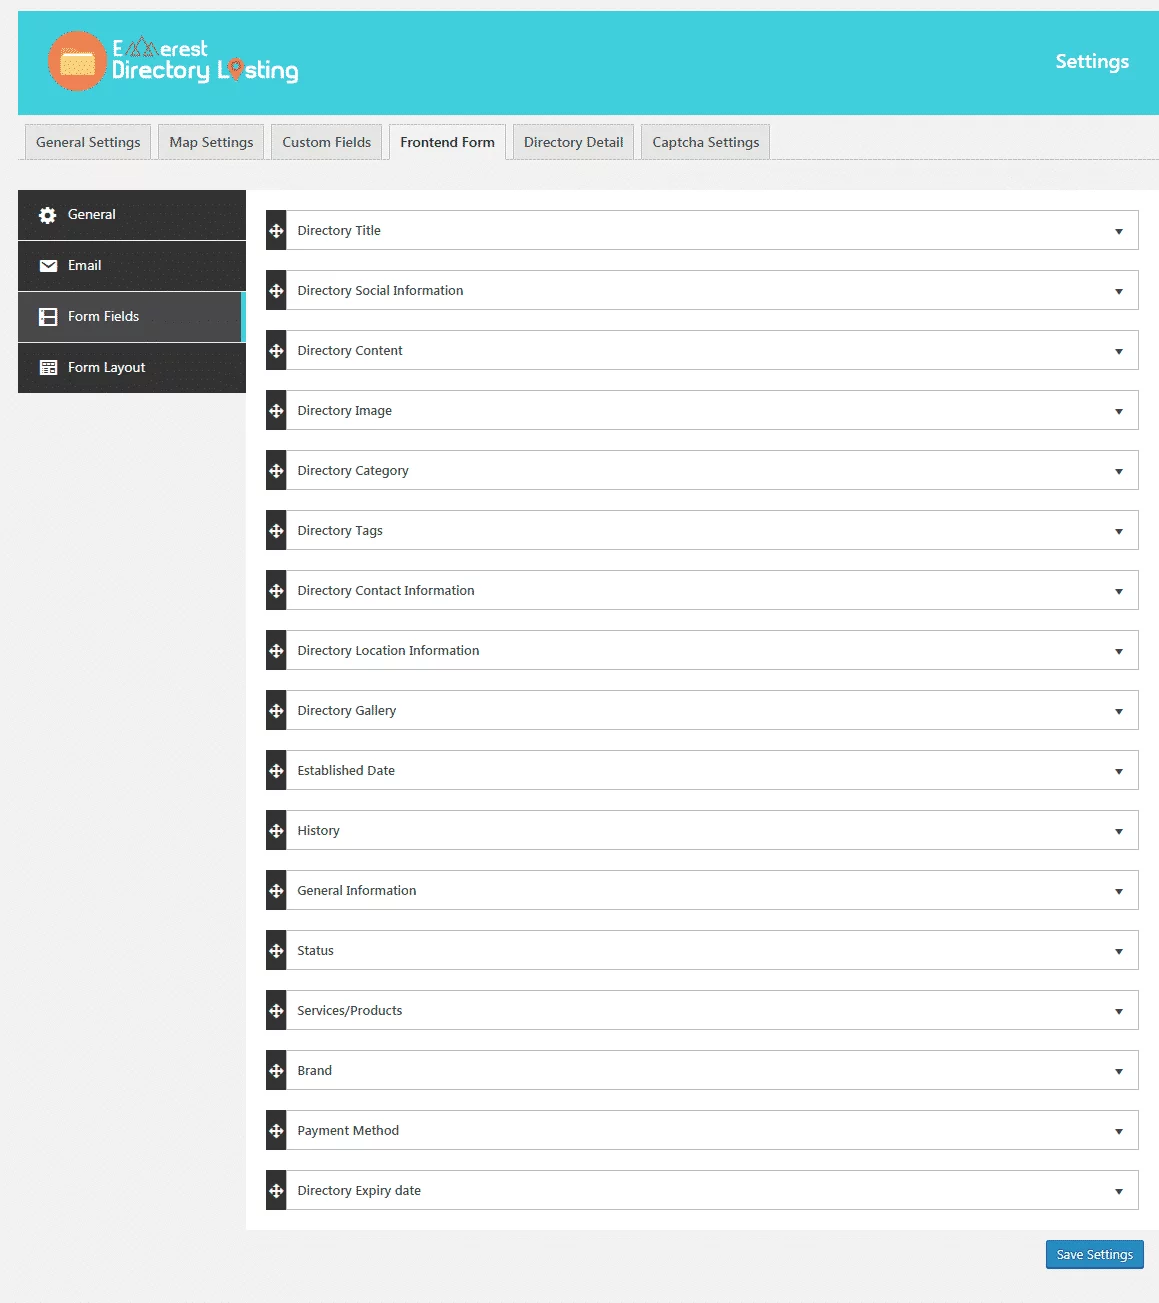
Form Field
From here, you can add and customize the custom field for your front-end submission. Create as many custom fields as per your requirement and then configure them.
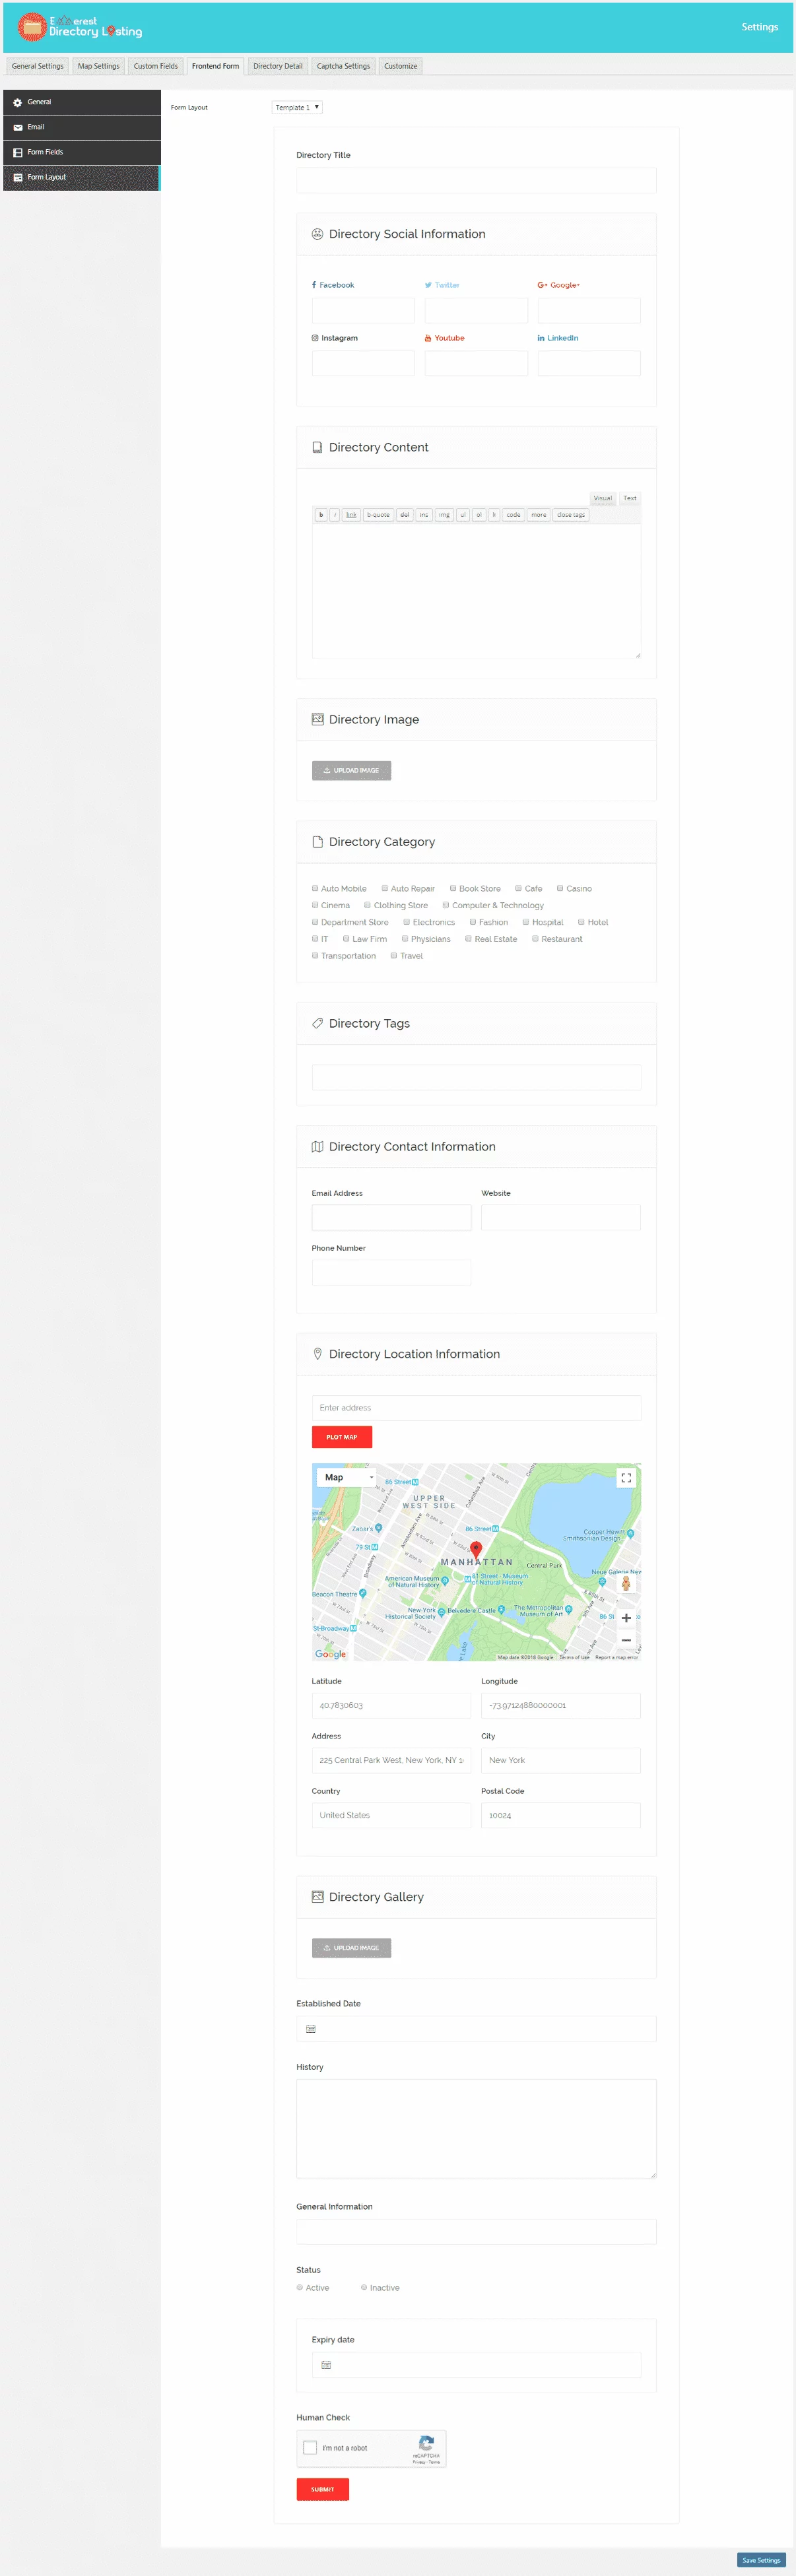
Form Layout
The form layout sub-settings section will let you choose the layouts for your front-end form submission. The plugin consists of 5 pre-available templates. Choose the best match for your WordPress website.
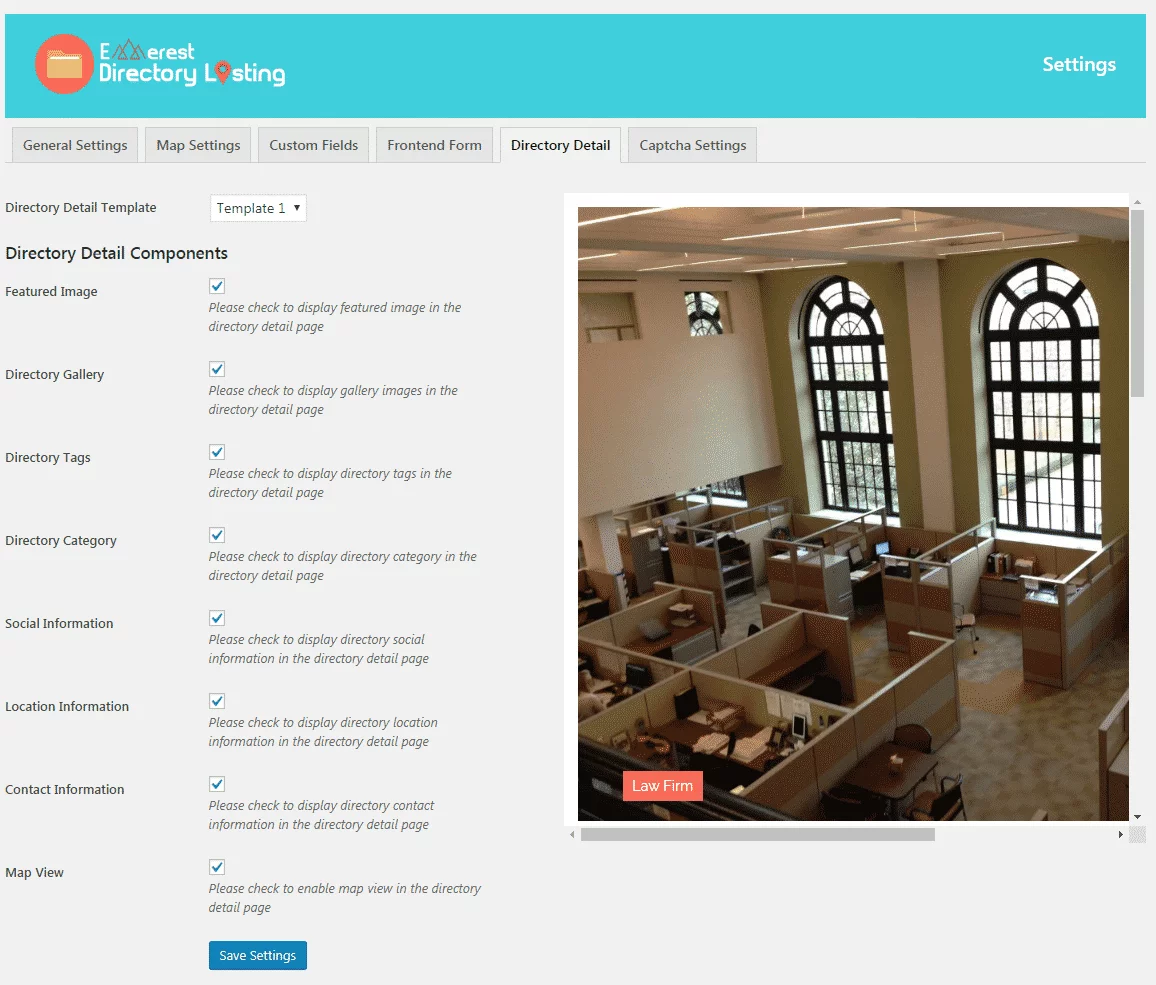
Directory Details
From the directory details section, you can choose the templates to display your directory. The plugin contains 3 inbuilt directory detail templates. So, choose the most suitable one for your WordPress website. Also, enable feature images, galleries, tags, categories, social information, location information, contact information, and map view for your directory listings as per your preference.
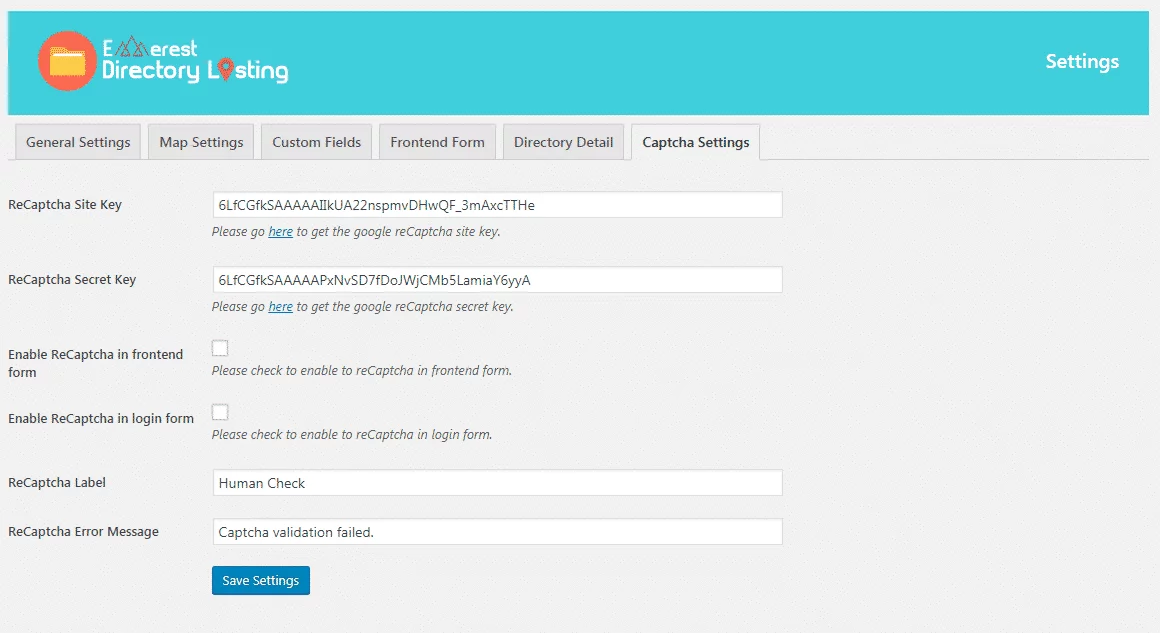
Captcha Settings
The Captcha Settings will let you add and configure Google ReCaptcha on your frontend submission form and login form. To add a new ReCaptcha for your forms generate the site key and secret key from the Google ReCaptcha site then, add the custom label and error message to assign the Captcha.
Wrapping Up
By the following steps you can create and manage online directories in your WordPress website. So, if you want to add and manage the business directories easily on your website then, you can purchase the above mentioned plugin and follow this step by step guide.
You can also check out a similar type of step-by-step tutorial:
How to Add Beautiful WooCommerce Product Slider on your WordPress Website? (Step-by-Step Guide)
How to add your Facebook page review to your WordPress website? (Step-by-Step Guide)