How to Add an Engaging Notification Bar on your WordPress website? (Step by Step Guide)
Placing a notification bar on the top of your WordPress website can be the best way to attract your visitor’s attention instantly. It allows you to add your site’s announcements, messages, or links to your site’s important content to direct your traffic increase your site’s engagement rate, and generate leads. Moreover, you can also place an email subscription letter or social media profile icons to boost the email and social media subscribers of your website.
A notification bar, being an essential tool for any website can be added using WordPress notification bar plugins available. So, you will have to be careful about finding the right one for your WordPress website. While choosing a notification bar plugin, you need to consider its features available in terms of layouts (templates that the plugin offers), positioning (on what position you can add your notification bar), and contents (what contents you can add on your notification bar). Also, you might look at some advanced features such as floating, fixed, or absolute positioning of your notification bar, duration to display notifications, trigger options, etc.
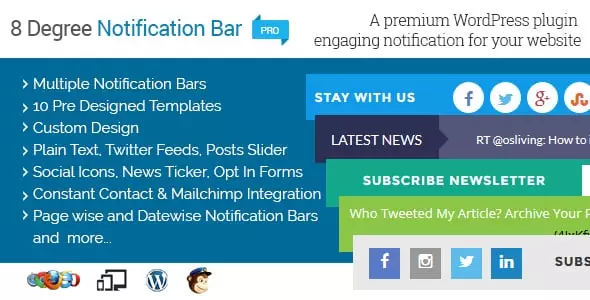
Here, in this article, we will be using 8 Degree Notification Bar Pro to show you how to add a beautiful notification bar on your WordPress website. It is an ultimate WordPress plugin that comes with cool templates and advanced settings for embedding your website with an attractive notification bar without using any codes.
So, let’s get started and add an engaging notification bar on your WordPress website:
Step 1:
Purchase 8 Degree Notification Bar Pro from the CodeCanyon marketplace at a reasonable price of $18. Then install it on your website. If there are any difficulties while installing the plugin then, check out its documentation. After, that activate the plugin.
Step 2:
After you have activated the plugin, you will see “Notification Bar Pro” on your WordPress dashboard. Click on it. You will land on the “Notification Bar” page. It consists of all the notification bars, you have created on your WordPress website. To create a new notification bar click on “Add New”.

Step 3:
You will land on to “Add New Bar” page. Then, give the name to your new notification bar. Then, choose the template for your notification bar. You can either choose any of the 10 pre-designed templates or your custom templates.

Step 4:
Then, enable/disable the components of your notification bar. There are 3 different components. They are:
Left Component
In the left component, you can add social icons that contain the link to your social media.

Right Component
In the right component, you can add the opt-in form, Twitter tweets, post titles, RSS feeds, marquee texts, etc.

Open Panel
In the open panel, you can set the hover text, header text, and footer text. Besides, you can also set the widget columns.

Step 5:
Then, set the duration of your notification bar.

Step 6:
After that set the position, visibility, and close button for your notification bar. Besides, you can also set whether to display the notification bar to the login users.

After you have configured everything, click on “Save Notification Bar“.
Wrapping Up
In this way, you can add notification bar on your WordPress website. So, if you too want to embed your WordPress website with an engaging notification bar then, you can purchase this plugin and follow this step by step tutorial.
For a detailed review of the plugin check out: Best WordPress notification bar Plugin- 8Degree Notification Bar