How to add JavaScript to WordPress pages or posts?
JavaScript is a programming language used to create interactive effects within web browsers. It is usually placed into an HTML or ASP file and runs directly from the webpage. Do you want to add JavaScript to your WordPress pages or posts? It allows a web designer the ability to intersect codes on their webpage.
The website having JavaScript is comparatively better than the one that doesn’t. Sometimes it might be necessary to add a JavaScript code to the entire website or the specific pages of your site. WordPress doesn’t allow you to add code directly to your posts by default. In this tutorial, you can learn, “How to add JavaScript to your WordPress pages or posts?”
Why add JavaScript to WordPress pages or posts?
If you want to add extra features to your website like embedding a video player, a calculator, or some other third-party service, then you will be often asked to copy and paste a JavaScript code snippet into your website to make it available. Understanding it’s importance it is sure you that you too want to add it to your site.
Thousands of plugins provide the feature to add JavaScript to WordPress pages or posts. We will be using Notification Bar Plugin to add it to our site.
Why Notification Bar Plugin?
- Create Multiple bars and use them as per wish on posts/pages.
- Support social icons.
- Compatible with all the browsers
- Fully HTML support: You can put any HTML in the message you want to display. So you can customize it any way you want.
- Extend bar feature: Sometimes the message space is not enough for you. You can use the extend bar feature which will slide down automatically at the time you set and will sidebar up to the time you set up. So you have an extra space to market your things without irritating the user.
- Enable/disable a particular post or page
Adding JavaScript to WordPress posts or pages
- Log In to your site or Click on Dashboard
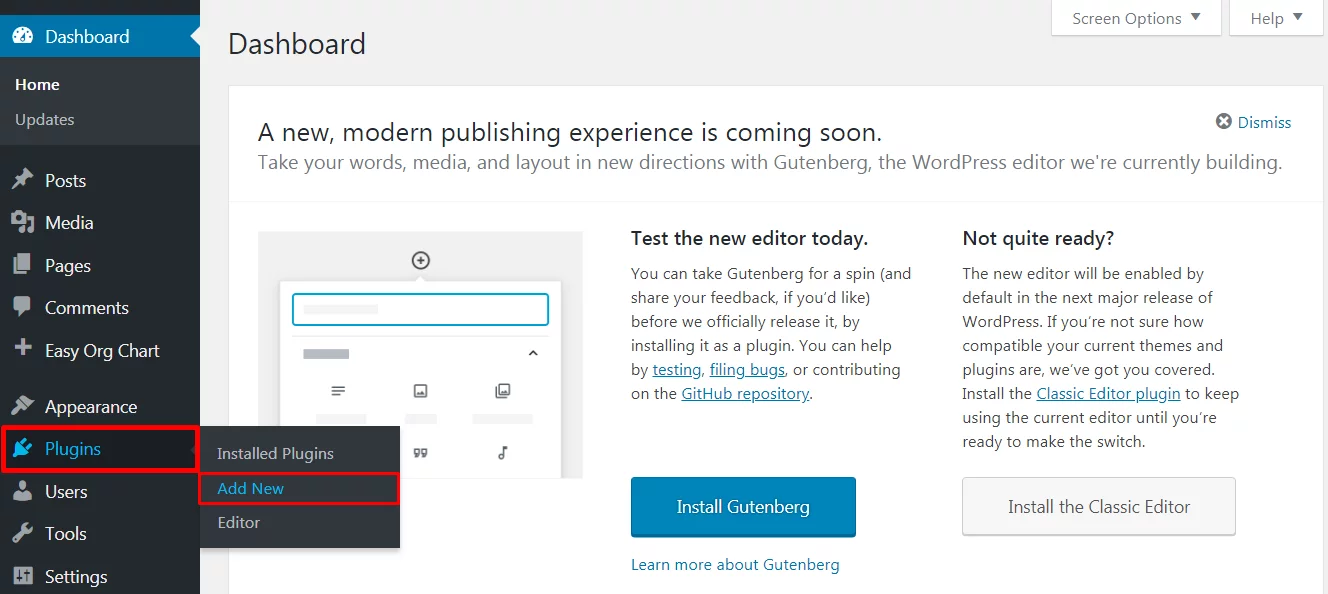
- Click on Plugins>>Add New
- Search for the Notification Bar Plugin in the Plugin Search Box
- Once the Plugin appears on your screen, Click on Install
- Once the plugin is Installed, Click on Activate
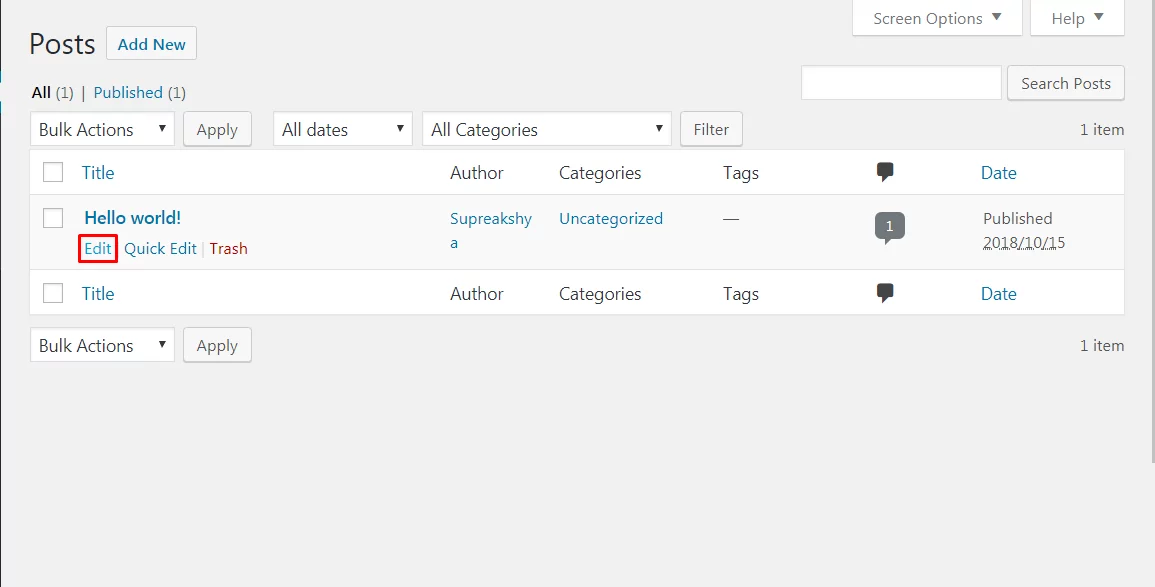
The plugin gets activated on your site. Now you can head towards adding JavaScript to your WordPress site. Edit the post or pages you want to add JavaScript
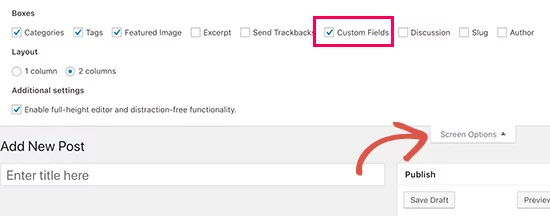
- Click on the Screen Options that appear on the upper-right side of your site.
- Choose the option of Custom Fields
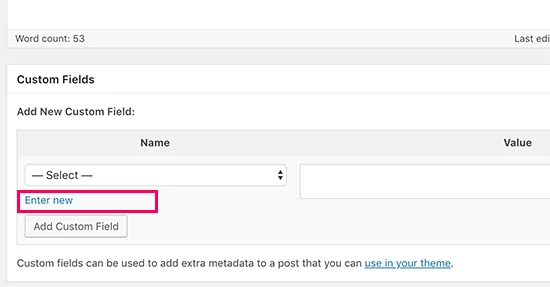
- Scroll down to the Post editor
- You can see the ‘Custom Fields’ meta box where you need to click on the ‘Enter new’ link.
The custom field appears with name and value fields once you click on Add Custom Fields.
- You need to provide a name for the custom field with a CODE prefix
- Paste the javascript code in the value field
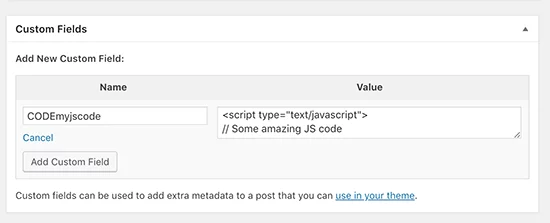
- Click on Add Custom Field to Save your changes.
You can easily use this Custom Field to save your changes. You can easily apply this custom field to embed the JavaScript code in any posts and pages of your site.
Wrapping Up:
Through this article, we learned to add JavaScript code to WordPress pages or posts. Understanding the importance of adding it to your site, this tutorial gives you detailed information to add it. If you have any queries, then Please leave them in the comment box below.
