How to Add SVG in WordPress?
First of all, let us know what is SVG. SVG is an XML-based vector image that is used in websites to display icons and logos in the website. They are mainly popular among all the developers as it scalable image formats. Generally, WordPress doesn’t allow uploading it to the sites due to security concerns.
Why add SVG to the WordPress Site?
- It itself opens up the vulnerabilities through which normal image formats are not affected.
- SVG includes bomb-nested entities and XSS Attacks.
- Utilizes the code.
- Enables to enlarge graphics without degrading the image quality.
- Save the images in small size without any errors.
Add SVG to WordPress Site
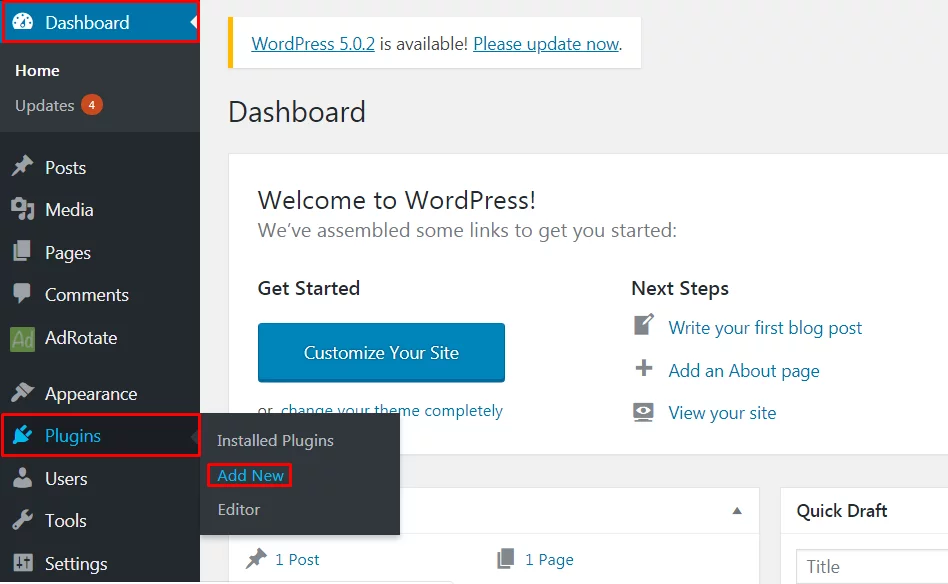
- Firstly Login to the Dashboard of the Site. On the Left bar, there is a Plugins option. Click on the button Add New.

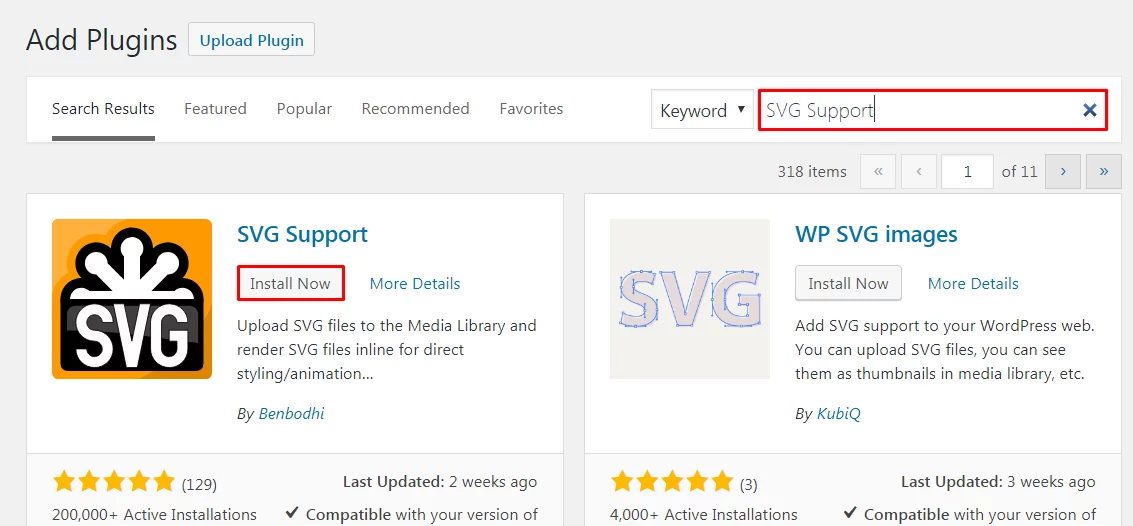
- Search for the plugins SVG Support. After seeing the plugin installed. Click on the Button Install Now and then on Activate. For more guidance look at the tutorial to install a plugin.

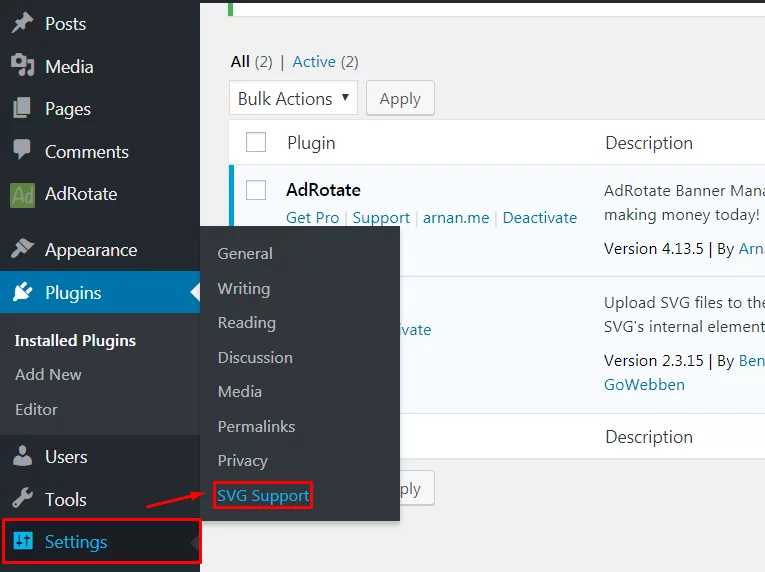
- Then Click on the Button Settings. Among the various options Click on the button SVG Support.

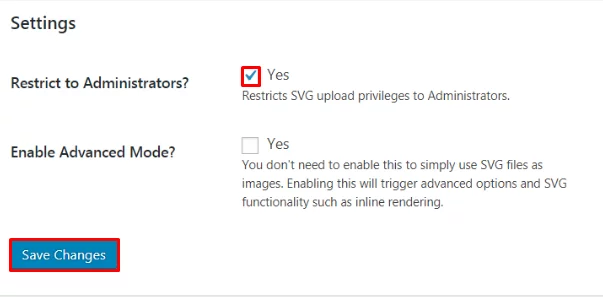
- Click on the box next to ‘Restrict to Administrators’. This option allows only the site administrator to upload the SVG files. Don’t forget to Click on the Button Save Changes to save the made Settings.

- Users can create a new post or edit the existing one. Upload the image in Post Editor. Simply add the image block to the editor then upload the SVG file.
- Now all of the users will be able to embed all the SVG files in WordPress.
Wrapping Up
Adding SVG in WordPress allows keeping the smallest image with amazing picture quality. This will make the site look more appealing, professional, and systematic. In this Tutorial, all WordPress Beginners are taught to add SVG within a few simple steps. The plugin suggested for use in this Tutorial is free as well as effective.
Hope the information was useful. Please leave the recommendations below. Feel free to share.
You can also check out our collection of:
