How to Add WordPress Widgets in Accessibility Mode?
Adding Widgets in Accessibility Mode is not so difficult task to do. But, many people don’t find it easy. WordPress Widget performs a specific function that provides a simple way of designing and controlling the structural function of WordPress. Many users don’t even know that there is a built-in accessibility mode for the widgets. Through this tutorial, all Beginners can easily add the available widgets in Accessibility Mode.
Way to Add Widgets in Accessibility Mode
- Firstly, the user needs to log in to the Dashboard of the site. Then Click on the button Appearance at the Left bar of the page. Then among the many options Click on the button Widgets.
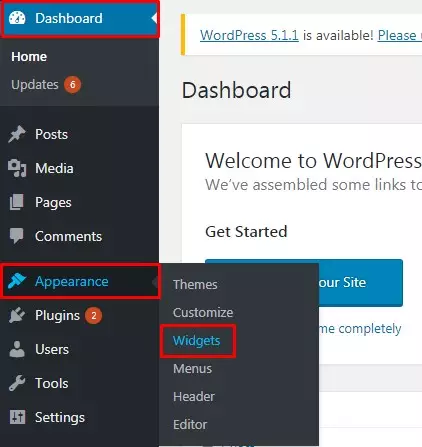
- Users can now see the Screen Options at the right top of the page. Press L if in case you are using Software and Keyboard.
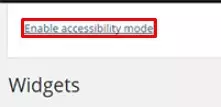
- Only ‘Enable accessibility mode’ will appear on the screen. Click on the button to begin the process.
- Now, it is enabled to add links in the Widget Title. Click on the button Add Link.
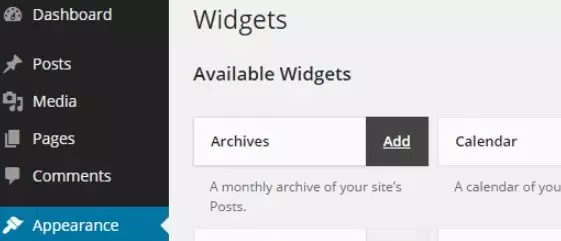
- After pressing in the Add Link the widget will Open on a single page.
- Now, Choose the Sidebar to Add the Widget.
- Click on the Position dropdown which enables you to Choose the position of a widget in the selected Sidebar.
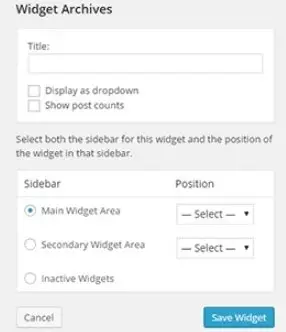
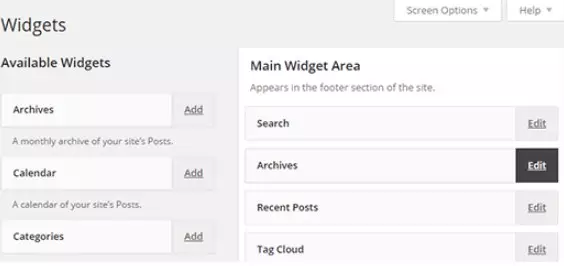
- Now the User will be redirected toward the Widget Screen. Now the user can Edit as well as remove the Widget Settings by Selecting inactive widget options.
Wrapping Up
By reading this tutorial, WordPress Beginners can easily Add the WordPress Widget in Accessibility Mode. Users don’t need to have any kind of coding knowledge. It’s the task of a few simple steps. Hope the information was useful. Feel free to share. Please Leave the recommendations below.

