What Are Author Boxes and Why Your Site Needs Them
Every website owner has one wish – to make it distinctive and unique. There are plenty of ways you can make your WP website remarkable and one of the features that can help you with that is the author box.
What is an Author Box?
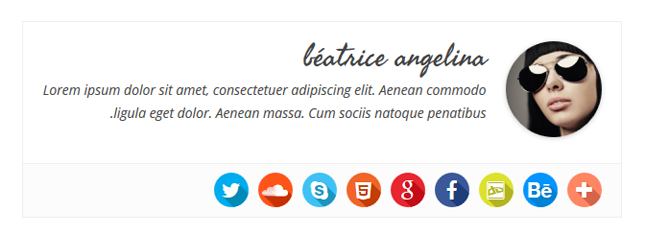
The author box is a box that contains information about the author/creator and is usually placed under the blog posts. It displays the author’s name, provides the reader with basic biographical information, and links to the author’s website or social media. This is completely adjustable and you can choose which information you want to display. This plugin could bring your website greater exposure and publicity, which would mean a lot to your business. Now we are going to show you some of the benefits of this feature, so stay focused.
The Benefits of Author Boxes:
- You can introduce your readers to the author.
- You can make a better connection between the author and the reader.
- Your authors will seem more approachable and reachable.
- They make the website organized.
- They can improve your SEO.
- They make your website look more professional.
Using the author box, you can introduce the author to your readers. The author is basically a provider of some information that readers are interested in. So why not make their experience even better and more personal by introducing them to the author? If you let your readers know who is the individual standing behind each piece of content, it will make your blog much more authentic. It will also make your website look more organized and professional. The author box can also help you with increasing the traffic to your website and improving your SEO.
How to Create an Author Box?
By now you have probably realized what is the importance of this feature, so now we will skip to the practical part. There are more ways to create an author box and add it to your website. On one hand, you can install it manually by using hard code, but this would be efficient only if you have one author and if you have some coding knowledge. On the other hand, you can make your life easier, not mess up your WP themes and add this feature with a plugin. The best solution for adding an author box is definitely the Simple Author Box plugin.
Introducing Simple Author Box

Simple Author Box by WebFactory Ltd. is undoubtedly one of the best plugins of this kind. This extensive plugin offers many adjustable features and adds a responsive author box to your blog.
You can display the author’s gravatar, name, website, description, and links to social networks. You can personalize it by your desire since it is so customizable. It also allows you to match the design of the author box with your theme by adjusting the style, color, size, and text options. This plugin promises that it will look great on your mobile phone or desktop. However, you can insert the author box at the end of your posts automatically or choose to insert it on your template file manually. This plugin has RTL and AMP support and integrates perfectly with WordPress.
However, the PRO version offers many more features. For example, with the PRO version, you can add over 45 social icons to your author boxes, add guest authors, or credit everyone involved for their contribution by assigning posts to multiple authors, changing the position of the author box, adding top authors widget which displays the most popular authors based on comments and so much more.
How to Use This Plugin
1. Create your account
Firstly, you will have to create your account using the email address with which you purchased this plugin, set up your password, and log in. You can create it by following this link: https://dashboard.wpauthorbox.com.
2. Installation
Once you have created an account, you can start installing the plugin. You can download the Simple Author Box plugin by clicking the “Download Plugin” from the left-hand side menu. Then you can activate the plugin with the license key and follow the guidelines.
3. Appearance
Since visual impression is significant, this plugin allows you to tailor your author boxes in a preferred way and offers plenty of features. You can change both, the margins and padding of your box and move it to the top, bottom, or both or add a border to the box and change its width.
There is also an option to change your avatar image, which can be in a style of a square, circle, ellipse, fancy, shear, or speed. You can also add animations and the option of rotation to the avatar image. Furthermore, you can display the author’s website in an author box, choose its position and enable the option to open it in a new tab.
This plugin also allows you to choose the style, rotation, and shadowing of the social icons that are displayed in the author box. There are many more options in this section concerning the border style and color and the background image.
4. Author Box Tabs
You can add a tab to your author box, adjust it and modify it according to your needs. There are many options to change the title, show the posts, add the content and change the entire design. To modify the tab, go to Appearance -> Author Box -> Author Box Tabs.
5. Colors
Since colors are the most distinguished way to express yourself, it is essential to add them to your author box. You can change the color of the author’s name, border, background, paragraphs, links, and social icons. You can make it pop or blend it in with your existing theme. To access this feature, go to Appearance -> Simple Author Box -> Colors.
6. Guest Author
This feature can be very useful if you want to publish an article that the authors from your team did not write. This way, you can use guest authors as co-authors or enable custom co-authors’ text. If you want to add this feature, go to Appearance -> Simple Author Box -> Guest Author.
7. Misc
This specific option can help you speed up your website using a CSS optimization plugin. This way, you might get a higher score on speed testing services.
8. Tools
If you want to access the Simple Author Box tools, go to Appearance -> Simple Author Box -> Tools. These tools might be handy if you want to export or import the settings between different sites or reset them.
9. License
There is also an option of activating or deactivating a specific license, as well as turning on the Whitelabel mode. To activate this feature, go to Appearance -> Simple Author Box -> License.
10. Dashboard: Rebranding / Dashboard: Manage Licenses
These features allow you to rebrand your plugin and change its name, appearance, and logo, but you should attach a license before that.
Conclusion
The author box is a great way to encourage the interaction between the reader, the author, and your website in general. It will connect your readers to your blog and help them understand the articles. Simple Author Box is the best choice because it brings out creativity and efficiency, which are probably the essential factors from the audience’s perspective.
Also, Check-Out: