How to Add Custom Icons or Font Icons in your WordPress Menu? (Screenshots and Video Included)
Adding icons and graphics to your WordPress website’s menu items is an effective way to improve the visual interest of your menu. It makes your WordPress menu more informative and helps your visitors to know more about the page before even visiting it. By doing so, you can motivate your visitors and guide them to navigate through different pages/posts on your WordPress website.
The icons and fonts can be added to your default WordPress menu by using WordPress Custom Icons plugins. Here, in this article, we will discuss the step-by-step tutorial for adding some awesome icons on the menu bar by using a WordPress plugin.
The plugin we are going to use in the tutorial is WP Menu Icons. It’s a premium WordPress plugin by AccessPress Themes. It is packed with a wide range of icon sets to add some beautiful icons and custom icons to your WordPress menu.
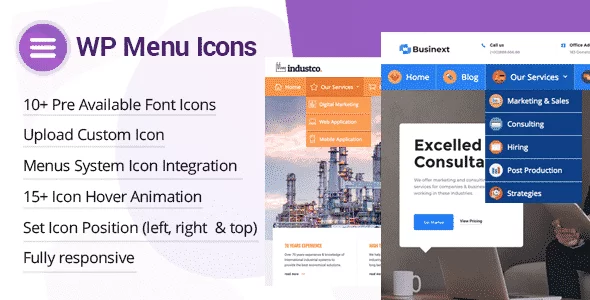
Some of the Main Features of WP Menu Icons:
- 10+ Readymade Font Icons for Menu
- Option to Upload and Add Custom Icons
- 15+ Hover Over Animation Effects
- Custom Styling Options
- 3 Different Menu Icons Position Options
- Compatible with All Types of WP Themes
Full Features and Details of WP Menu Icons
Add Custom Icons or Font Icons on your WordPress Menu Using WP Menu Icons Plugin
Now let’s add some awesome custom icons to your WordPress menu in a few steps.
Step 1:
Purchase WP Menu Icons Plugin from the CodeCanyon marketplace at the discounted price of $7. (Since AccessPress themes are providing 70% off for its promotional sale.) After, you purchase the plugin, install it, and then activate it. If you have any problem while installing the plugin then, you can refer to its documentation.

Step 2:
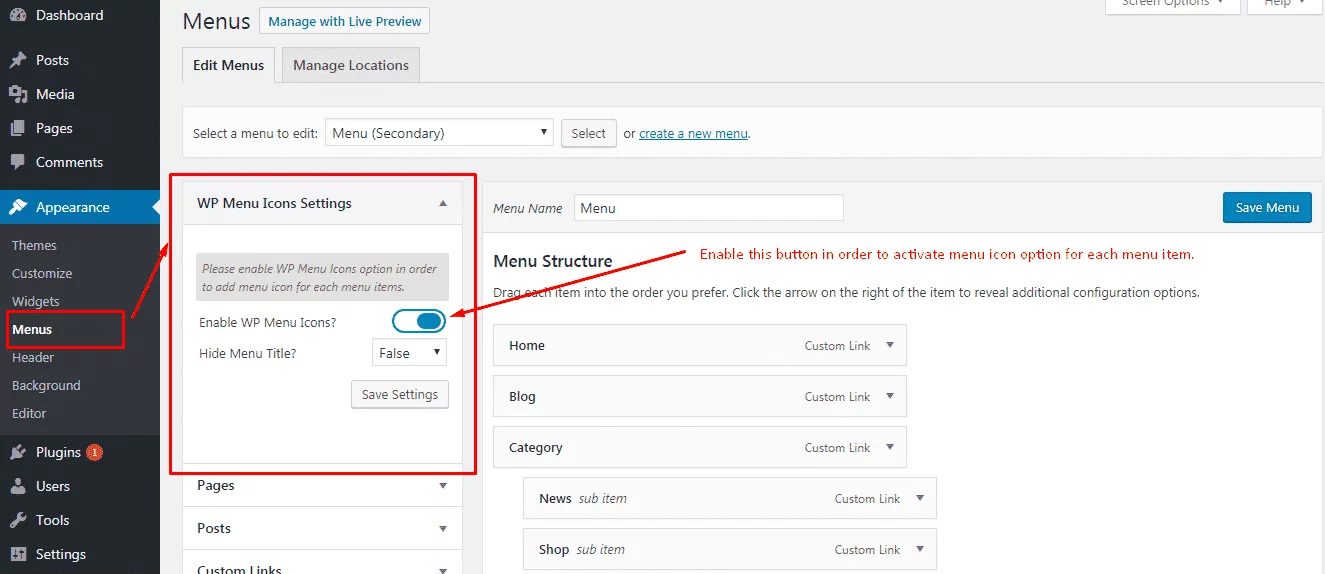
After you activate the plugin, go to Appearance > Menus for adding the icons to your website’s menu. There, you will see the WP Menu Icons Settings section. Enable the menu icons setting to start adding the custom icons on your menu items.
Step 3:
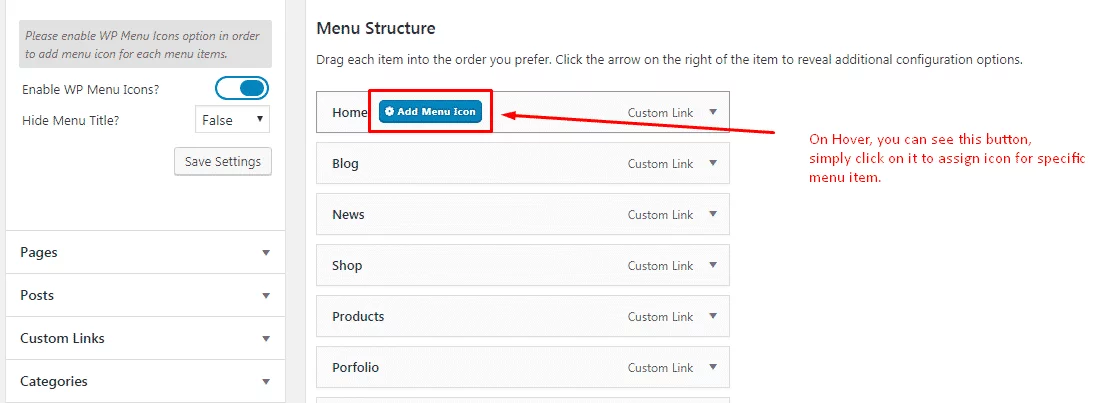
Then, hover over any of the menu items. You will Add Menu Icon button appear. Click on it to assign icons for your menu items.
Step 4:
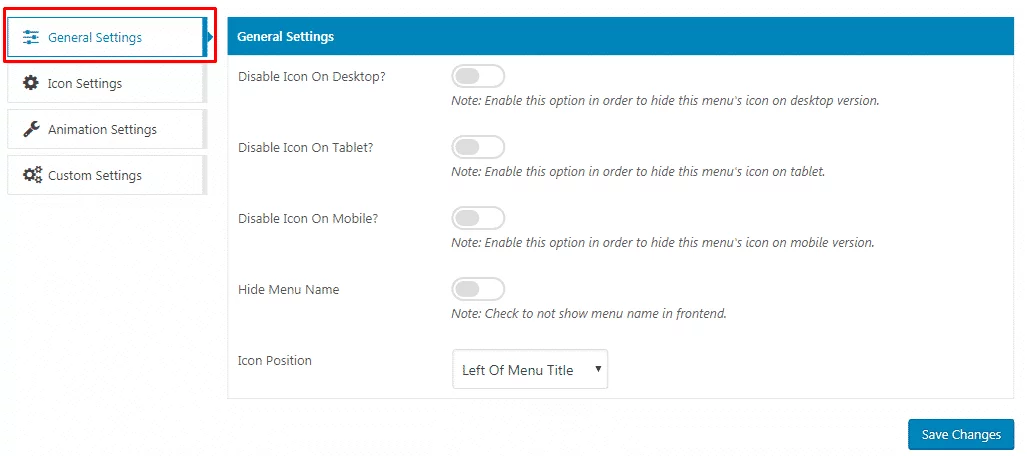
After clicking the button a popup will appear on your screen. It is WP Menu Icon Settings. From here, you can add the icons to your WordPress website’s menu. It consists of 4 settings sections. They are:
General Settings
On the general settings, you can enable/disable your menu icons for desktop, tablet, and mobile. Configure them as per your preference. Also, set the position of the icons.
Icon Settings
The icon settings will let you choose the icons for your menu items. You can either choose the pre-available font icons or upload your custom icons. Add the most suitable icons for your menu item.

Animation Settings
After you choose the icon for your menu items, you can display it through various animation effects. The plugin contains 15+ cool animations for animating your icons. Choose the most attractive animation for your menu icons.
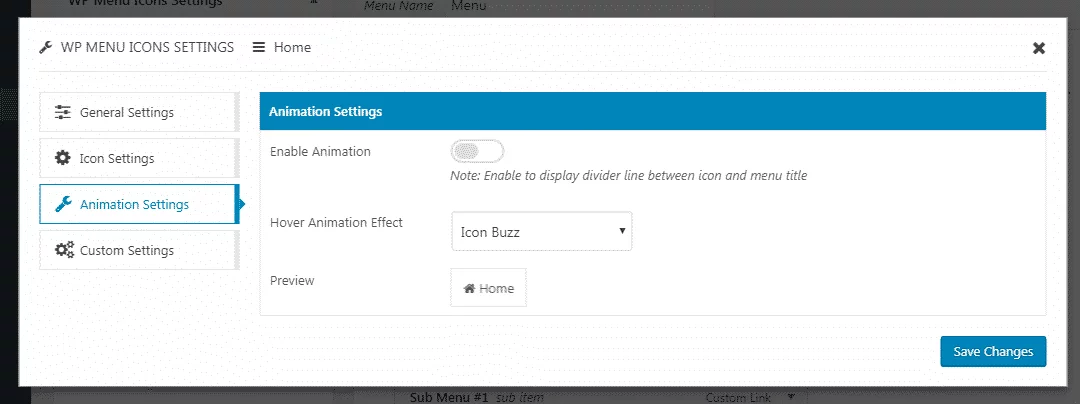
Custom Settings
The custom settings will let you customize the font size, font color, hover color, and icon divider of your menu icons. Customize the icons as per your requirements to display beautiful menu icons for your WordPress menu. Moreover, you can customize the menu label from here.
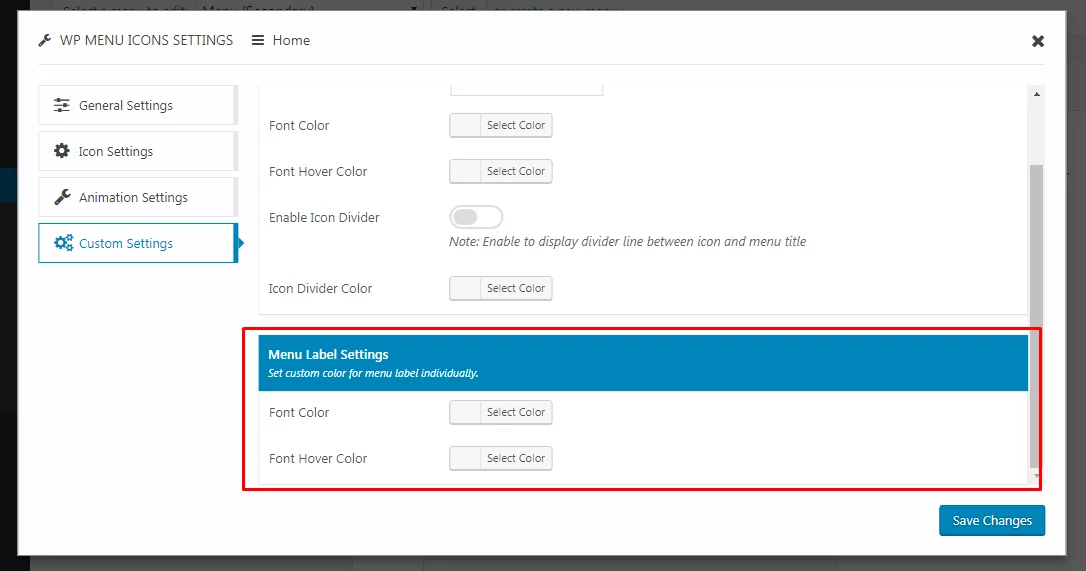
After the customization is done, save the settings. Now follow a similar step to add the icons for each of the menu items. After, you are done the menu like in the one below can be obtained.

Also, check out the video tutorial for adding the custom icons on your WordPress menu using WP Menu Icons plugins:
Wrapping Up
In this way, you can add the custom icons in your WordPress menu. A navigation menu is always important for any websites and making it attractive to your audience can be many benefits. So, if you are interested on adding the icons on your menu bar then, you can purchase this plugin and follow the tutorial.
For the plugin collections of:
Top 3 Custom Icons Plugins for WordPress Menu – Compared
Also, check out a similar type of step-by-step guide:
How to add Off-Canvas Fly Menu in your WordPress Website or Blog (Step by Step guide)
