How to add Skype contact button on your WordPress website using WP Skype Contact Button plugin?
Including a Skype live chat feature on your WordPress website or blog is an effective way to encourage your visitors to contact you through instant messaging or online calls. Your potential customers, after visiting your website may have various types of queries or pre-sale questions regarding your products or services before purchasing them. Providing them with the required support through instant online messages and calls can be just the thing needed to persuade them to make the purchase.
Skype live chat, although is a trending feature for any website that sells products/services doesn’t come inbuilt on WordPress themes. So, to add the functionality of live Skype chat on your website, you can take the help of WordPress Skype Contact Button plugins available on the internet.
Here, in this article, we have used the WP Skype Contact Button for embedding the Skype button on the WordPress website:
Let’s add a beautiful Skype Contact Button on the WordPress website using the WP Skype Contact Button:
Step 1:
Get the WP Skype Chat Button plugin from the CodeCanyon marketplace at a reasonable price of $9. Then, install the plugin. If any help is needed, you can refer to the documentation or check out the blog – How to install a new plugin in a WordPress website?

Step 2:
Now, in your WordPress backend, you will see the “WP Skype Contact Button” on your side menu. Click on the menu to start customizing the Skype button.
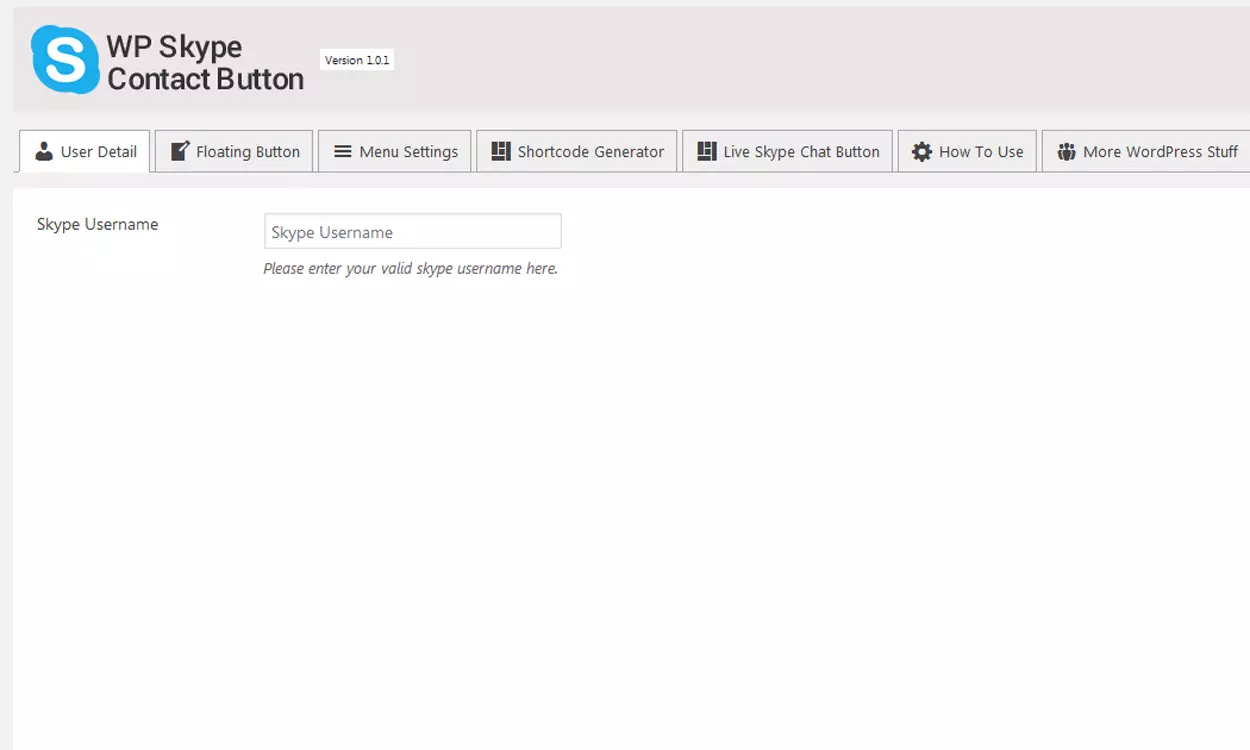
The 1st tab you see on the WP Skype Button is user detail. Insert the Skype username to move to the next tab.
Step 3:
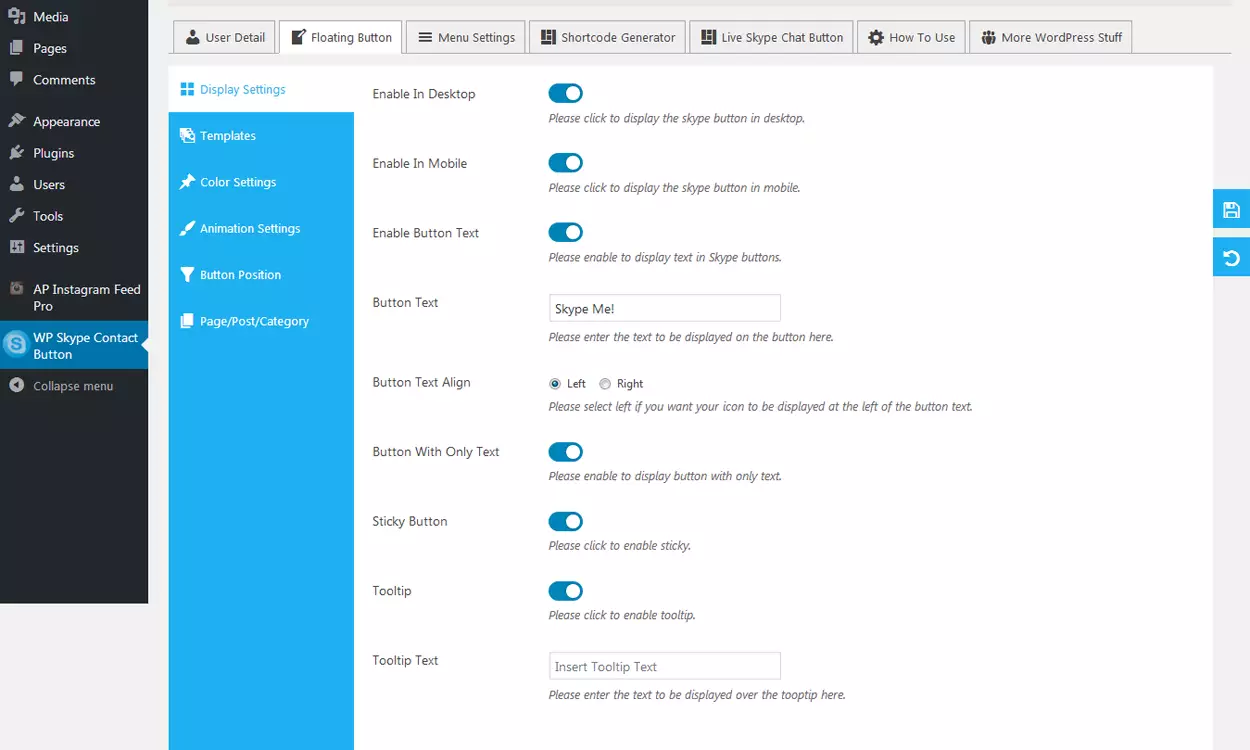
The 2nd tab of the WP Skype Contact Button plugin is a floating button. It lets you add the Skype Contact button in the form of a floating button. Configure the various customization options such as display settings, template options, color settings, animation settings, and button position options.
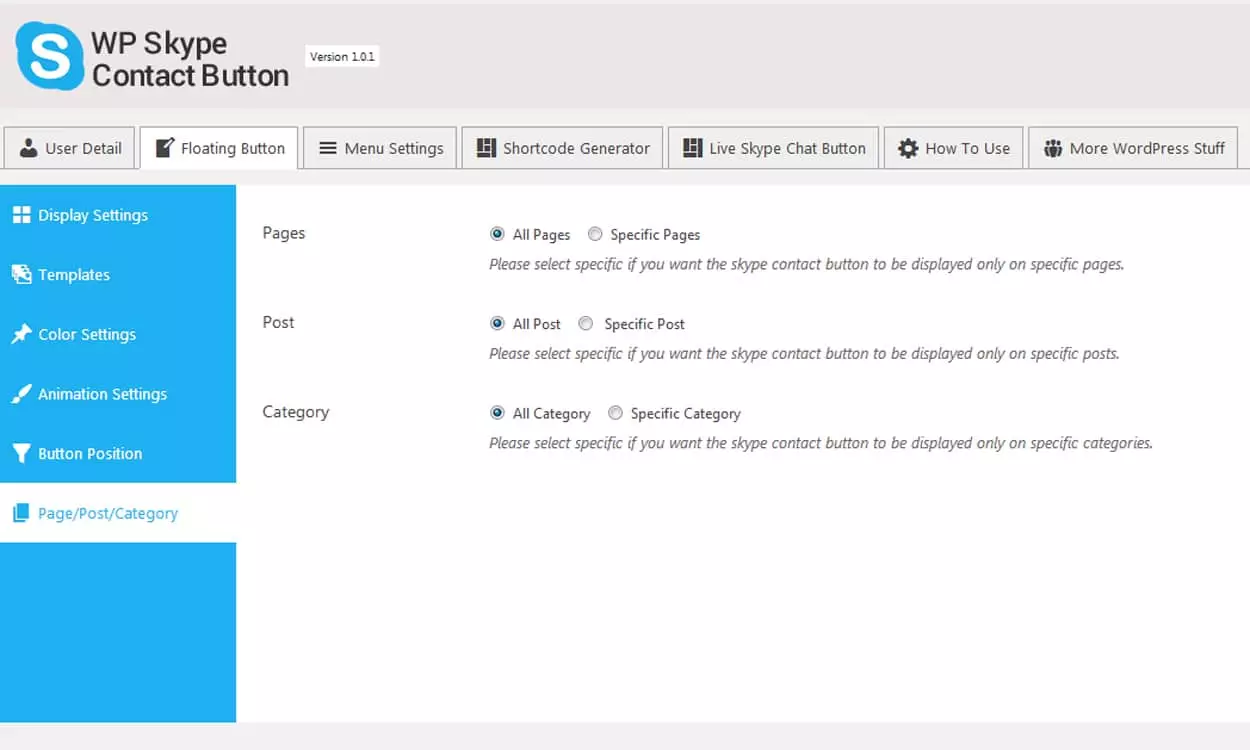
Moreover, the plugin will also let you specify the page, post, and category for adding the Skype Contact Button.
Step 4:
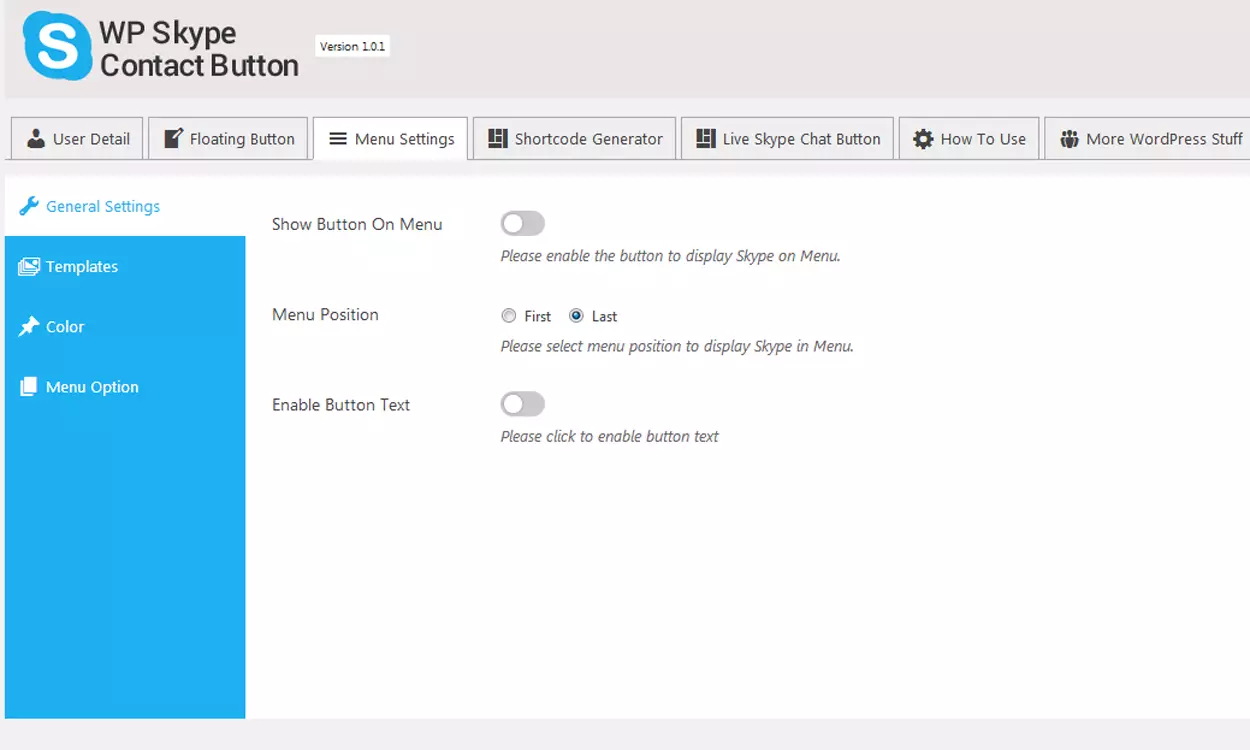
Then, the next tab is menu settings. It lets you add the Skype button on the navigation menu of your website. If you want to add a Skype contact button on the menu bar, you can enable the setting and start customization. The customization includes button positions, template options, and color options.
Step 5:
The 4th tab of the plugin is Shortcode Generator. It allows you to add the Skype button on a specific page, post, widget, or custom post type using the generated shortcodes. The customization set included here includes display settings, template options, color settings, animation settings, and contact details.
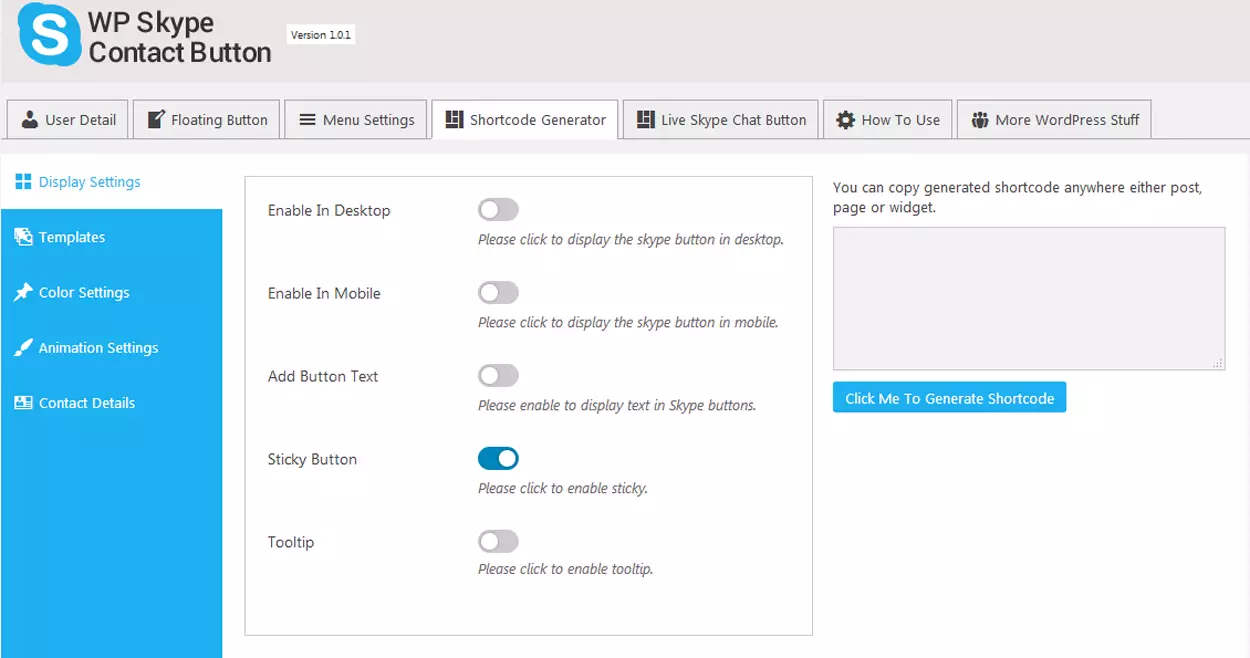
After you are done with all the customization, generate the shortcode, copy it, and paste it on any pages, posts, widgets, or custom post types of your choice.
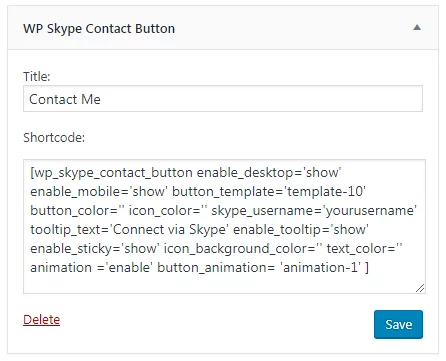
Step 6:
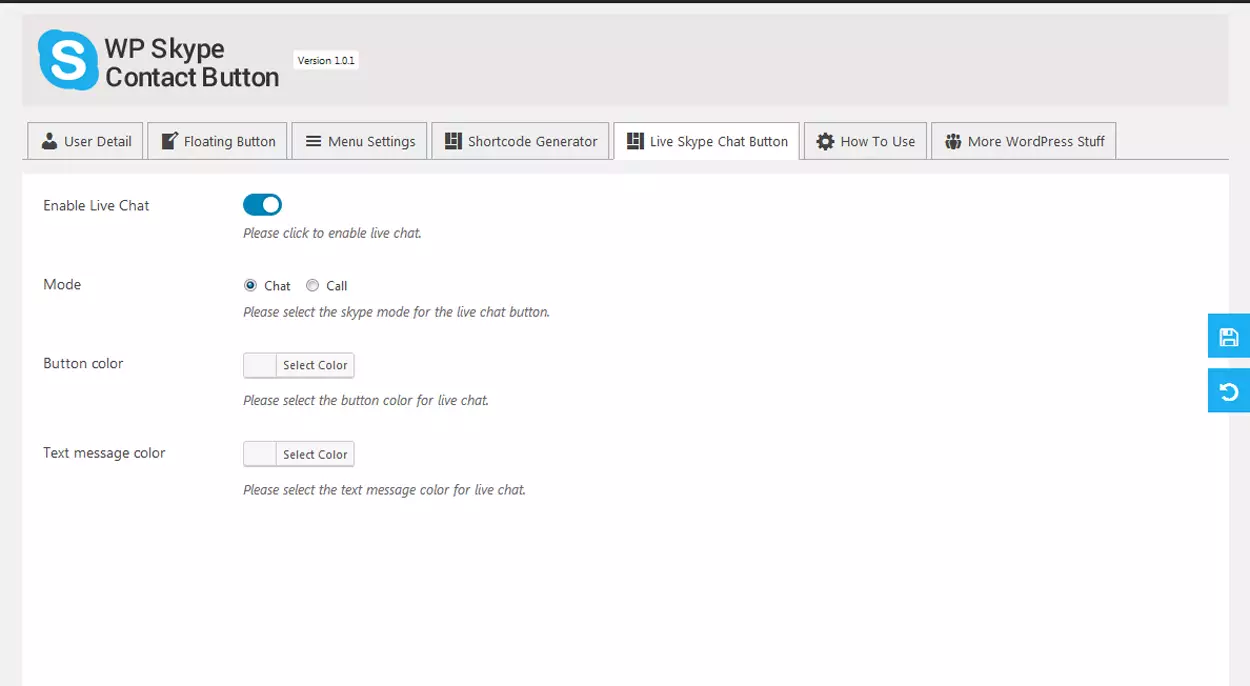
The final customization tab of the WP Skype Contact Button is the Live Skype Chat Button. Enabling this option will allow you to start the Skype live chat and call from the website itself.
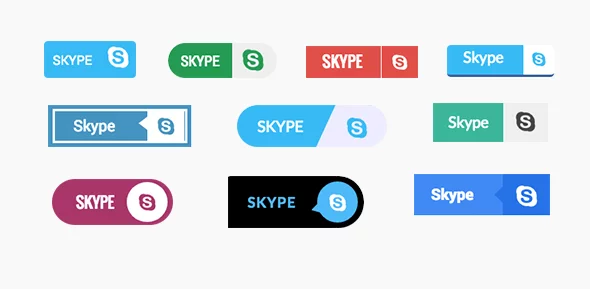
After all the customization is completed the Skype button of the following templates will appear on the pages, posts, widgets, or custom post types where you have enabled your Skype to live chat button.
Wrapping Up
This way you can add beautiful Skype Contact Button on your WordPress website and blogs. Since, Skype and live chat are very much trending nowadays, adding the Skype Contact can provide various types of benefits to your WordPress website. So, if you are interested on integrating Skype live chat and call option on your WordPress website then, you can this step by step tutorial.
You can also check out the collection of:
5+ Best WordPress Skype Contact Button Plugins 2023
5+ Best WordPress Author Bio Box Plugins
5+ Best WordPress Mega Menu Plugins for your website (Free Edition)
15 Top WordPress Drag and Drop Page Builder Plugins
Top 10 WordPress Booking Calendar Plugins 2023
Also, check out similar types of plugin tutorials:
How to add an author box to a WordPress blog? (with or without the plugin)
How to add an Off-Canvas Fly Menu in your WordPress Website or Blog (Step-by-step guide)
