How to Create an Online Course with WordPress in 2024? (The Ultimate Guide)
Welcome to the ultimate guide on creating an online course with WordPress in 2024! In this article, we will be your companion to help you create a full-fledged online system with WordPress in no time. We will walk through each step, from deciding on the course content to selecting a domain and hosting to an educational theme and an LMS plugin. Further, we will share a few statistics and popular approaches to help you quickly create a functional online course! Make sure you read this article until the end to grasp how to use WordPress – the most popular CMS (content management system) to power your online course!
Why Create an Online Course with WordPress?
Online learning is blooming and is expected to reach $350 billion by 2025, a report by Research and Market shows!
Not only are these forms of learning accessible, but over 6.9 million people in the United States take online courses! And that’s not it! 86% of students believe online learning to be better than the traditional approach! Here, if you can create an online course that aligns with the interests and needs of students, you can build a learning business for yourself. Further, you can use
a platform like WordPress to power an online course. With over 40% of all websites being powered by WordPress, it offers a wide variety of Learning Management System (LMS) plugins that allow you to integrate courses into the website and easily create, manage, and sell them.
WordPress is user-friendly, allowing beginners to create an online course and start selling upfront without having to dive deep into the world of coding.
Here are a few reasons why we think WordPress is the best platform to create an online course!
- Ease of Use: WordPress is easy to use and offers accessible interfaces that allow beginners to create online courses easily.
- Flexibility: With a wide range of options from themes and plugins to add-ons and third-party integration, WordPress can be very flexible for creating a full-fledged online course!
- Cost-Effectiveness: WordPress is a free platform, meaning you wouldn’t have to pay anything to create your online course. Unlike platforms like Shopify and WIX, WordPress is entirely free. You have to pay for premium themes and guides you use, but that’s it!
- Integration: WordPress is compatible! It functions beautifully with all WordPress themes and plugins. WordPress is very consistent when it comes to third-party tools like marketing tools and other software. Depending upon the need of your online course website, you can integrate tools to enhance its effectiveness without worrying about compatibility. It seamlessly integrates payment gateways and marketing tools to facilitate your online course further.
- Scalability: WordPress is a perfect choice for creating an online course because of its ability to scale up! As your business grows, you can also enhance the functionality, features, and the way your website functions. You always have the option to scale your business with WordPRess!
- Community Support: With over 40% of websites being created using WordPress, it has an active community of WordPress users ready to help you tackle the simplest to the complex issues. You can contact a community forum or request support for further guidance and assistance from your fellow WordPress users.
- Ownership and Control: Being an open-source platform, WordPress gives you full rights and control over what you do on your website. You’re free to move from one hosting to another without worrying about compliance and other aspects of your website. Unlike other LMS platforms, you’ll have ownership over the content you post!
Creating an online course with WordPress combines all these features, allowing you to deliver an engaging experience.
Let’s now proceed towards the steps of creating an online course!
Creating an Online Course Using WordPress
Creating an online course is about more than just setting up your website and selling the content course. Indeed, it is one part! But, various other steps are involved in creating a successful online system. In this article, we will learn from the basics, including defining your audience, conducting a market search, and choosing a domain and hosting name.
Further, we will learn about setting up your WordPress website, from installing WordPress to selecting a suitable theme and installing all the essential plugins.
Next, we will offer suggestions on how you can create course content, from planning to choosing the proper content format and integrating multimedia into it.
The other steps in creating an online course involve managing the course enrollments and payments. Further, we will also suggest how you can market and promote your approach. So, grab your coffee and get ready as we delve into the ultimate guide to creating an online course with WordPress.
Step 1: Understanding the Basics of Online Course
There are several online courses on the web, each having its target audience, the users they are being created for, the format, the objective behind the course content, and the course content that is in demand. You must also be aware of which hosting and domain names are most accessible! The first step of creating an online course is understanding the basics.
It can be further divided into four significant criteria!
Step 2: Identifying your Target Audience and Niche
The online course you create will not be for everyone. Therefore, you must have a target audience under whom you’ll craft and sell your course content to them.
There are various ways to identify your target audience. They can be based on age, gender, location, or occupation. Further, the identification can also be done based on the interest motivation.
Your first step towards creating an online course is being able to identify your target audience and learn about their demand in the market. Is it something related to time management or coding? Or a leadership skill? Identifying your choice and target audience will help you find a balance between specificity and broad appeal.
Step 3: Defining your Course Topic and Objective
Once you’re done with your market search and the niche you want to write under, the next step involves identifying the course topic you wish to cover in your content. Further, you must ensure that it fulfills the objective you’ve set!
For this, you just don’t have to do what everyone does! You must identify the area that you’re knowledgeable and passionate about! If your interest lies in coding, you’ll not be the best at creating a leadership course. So, depending on your knowledge, you must adhere to the course topic!
Furthermore, you also need to see if anyone is in search of the content you’re trying to create! Will this online course solve a problem or fulfill a desire? What will students be able to do after the completion of the course?
You must create a course that serves certain objectives. One great idea is aligning with what’s in demand in the market!
Step 4: Performing Market Research
The next step is identifying the trends and analyzing your competition. Proper market research will give you insight into your competitors and the course content they are creating. Further, you can learn about their topics and course structure. Here, you can understand if there is any room for your course! You can also create strategies for similar classes.
Step 5: Choosing the Right Domain Name and Hosting Service
A domain name is a name you provide to your online course through which it will be known to all the potential readers and users on the Internet. On the other hand, a hosting service hosts your website on the web. When evaluating a domain name and hosting provider, you must consider factors like speed, uptime, scalability, and customer support. Many hosting services also come with a domain name service, making it more straightforward! When it comes to WordPRess hosting service, you can select from a wide range of plans like shared, VPS, dedicated, or managed.
When selecting a domain name, we suggest going with one that is memorable, brandable, and aligns with the course plan you’re creating!
To simplify it, we have listed the best WordPress hosting services for you to look at!
You can’t have a website without a web host and a domain. A hosting provider helps make your website accessible via the World Wide Web. A domain, on the other hand, is an address that people type on URL bars to get to a specific site.

Unfortunately, these are things you can’t get for free. A new domain name, for instance, will typically cost you something like $10 to $12. Some domain names even cost millions of dollars.
So, what influences the cost of a domain name? There are four factors:
- SEO friendliness: A domain name that contains a popular keyword will cost more.
- Demand: A domain name that’s in demand will make its price increase.
- Extension: A .com extension is the most familiar among web users so it’s more expensive than a .org extension. A .net extension can be a good alternative to a .com extension since it’s also known but is cheaper.
- Renewal charges: A domain registrar can charge you with renewal fees even after you purchase a domain name.
That’s not to say you should get the cheapest domain name there is. You should choose your domain name carefully because it’s probably one of the first things about your brand your potential customers will see. Your domain name should be unique. It should be short–just under 15 characters—and easy to spell so people will remember it. Lastly, like I said, use important keywords in your domain name.
Many web hosts offer free tools you can use to check if a domain you like is still available.

Source: Name
There are also domain search tools you can use. Domain.com, for instance, is a popular one.
Now let’s talk a bit about hosting.
Be prepared to pay as little as $2 to as much as $20 or more for a web host. You’d have to shell out more the more complicated your website is. That’s because an e-commerce store, for example, will probably use more storage space than a simple blog. You’d have to pay for that extra space for your site to run perfectly.
Storage space isn’t the only thing you should consider when choosing your hosting provider. Here are other factors that are as important:
- Uptime: Hosting providers that offer an uptime of 99% and above are your best bet. Below that you can expect your visitors to encounter problems when they visit your website.
- Loading speed: Make sure your web host can offer lightning-fast loading speeds. According to Loadstorm, one in four people will abandon a site if it takes more than four seconds to load. Besides, Google prioritizes speed when it ranks websites. Bitcatcha has a great list of the fastest web hosts in the market so far. You might want to check it out.
- Data security: Your web host should offer constant backups so whatever happens, your data will still be there. Look for an SSL certificate, too, so you’ll know any sensitive data that goes to the site is kept private.
- Traffic limit: Pay attention to the number of allowable visitors a web host allows every month. Once your website visitors exceed that number, one of two things can happen: you get charged more or your website just stops working. That second one is definitely not a good thing if your goal is to build an audience.
- Customer support: Your web host should have great customer support. You want to be able to ask for help even in the wee hours of the morning if something happens to your website. You’re tr
The most popular web host is Bluehost. Your choice of hosting provider, however, should still depend on your preferences and business needs.
Step 6: Setting Up a WordPress Website
Once you’re done with the first step, which is identifying your audience, deciding on the type of course content to create, and selecting the best domain and hosting services, it’s time to set up a WordPress website. There are a few more steps involved in setting up a WordPress website!
Step 7: Install WordPress
Some web hosts install WordPress automatically for you. That’s the easiest option. But if you or your new hires are the types who like to experience things, then you can install WordPress yourself. Just a heads-up, though: it’s a technical process. You will need to be familiar with language and encoding to complete the process.
Here are the basic steps you’d need to follow:
Download WordPress: You can do that from https://wordpress.org/download/.
Set up a database and a user number: You might already have these once you purchase your web host so it’s best to ask first or at least check yourself. If you don’t have the database set and username just yet, you can use phpMyadmin to create them.
Configure wp-config.php: You can let WordPress do this for you or edit the file yourself.
Upload files: You should upload these wherever you’d like your website to appear on your domain.
Complete installation: Customize according to your preferences. So, you’d have to include a password and your email, among other things.
You should see the login prompt if the installation is successful.
Step 8: Assess Your Site
You probably want to take a look at your site first so you’ll know the changes you want to make in the first place.
You can access your site through this URL: http://www.yourdomain.com/wp-admin. You should get something like this on your screen:

Input your username and password to get to the WordPress Dashboard:

To see the site–which at this point is just your homepage—just click on your site name on the toolbar.
You’ll get something like this:

That’s the default WordPress Twenty Twenty-One theme. There’s a header and a tagline. In the middle of the page is where your content will go.
Most WordPress users don’t go for the default theme because, well, it’s just too simple. Besides, since it’s the default theme, the chances of your website looking exactly like the other new WordPress websites are higher if you stick to it. That brings us to our next step: how to change the theme.
Step 9: Select a Theme
To change the theme, go back to your WordPress Dashboard. Click on Appearance located on the left side of your screen. You’ll see Themes first.

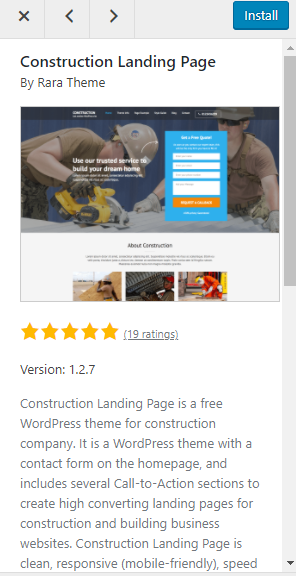
Click on it and you’ll see the default theme. To add a different theme, just click on Add Theme. You should get something like this. It’s a list of themes you can install for use on your website. Hover your cursor over each theme and click on Preview to get additional details on the theme and get a glimpse into how that would look.
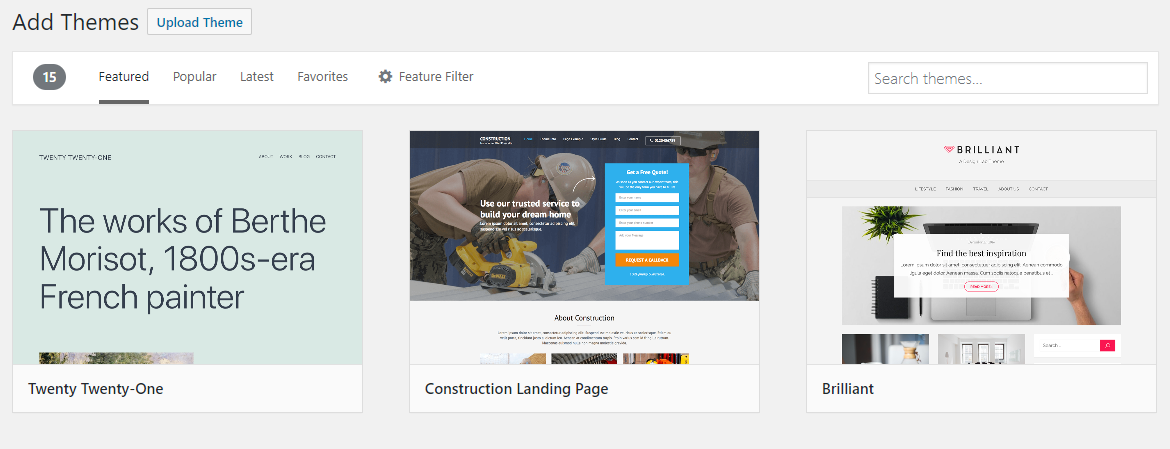
So, if I click on the Construction Landing Page, for example, I get something like this:
You can even search for a theme using the search query bar in the upper portion of your screen.
Once you’ve decided on a theme, just hover your cursor over that theme again and click on Install. Then just activate it for use by clicking on it again.
If your theme is in a .zip format, you can just upload it to WordPress. Just click on the Upload Theme button right beside Add Themes. You’ll see something like this:
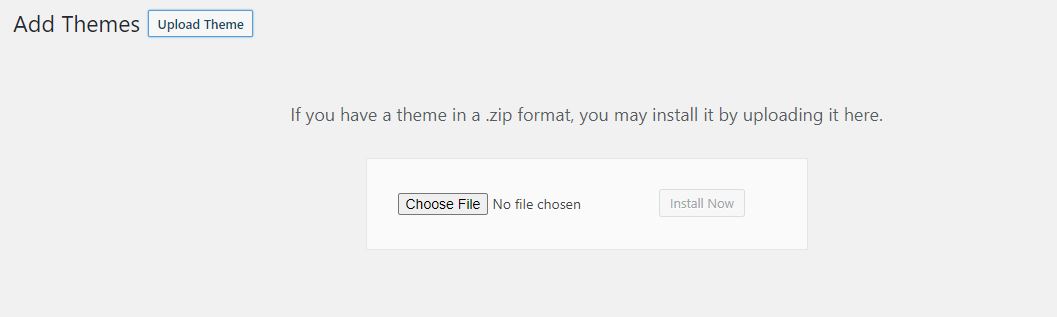
Choose your file from your computer and click on Install Now.
There are many ways to make your WordPress website look good. Just experiment with what WordPress gives you to find the one that works for you.
Step 10: Add Plugins
The beauty of WordPress is that you can just upgrade its functions as you go along. You do this by installing plugins or extensions.
There are WordPress plugins you should consider installing because they will definitely help your site performance. Here are some plugins you might want to consider:
- Yoast SEO: The plugin helps you optimize your site for SEO.
- WP Smush: Use this to compress your files and ensure fast loading times.
- Creative Mail: The plugin helps you access material from your site directly to be sent to your email subscribers.
Since yours is an online course website, here are a list of the best LMS plugins to enhance your online course!
Don’t get too carried away with the plugins, though. If you install too many, your site might just end up crashing frequently. You might even get security breaches. According to Torquemag, 20 is just the right number for these extensions.
Step 11: Craft Your First Online Course
Once you’ve settled on your website’s appearance, you can start writing your first post.
Go back to the Dashboard. Click on Posts.
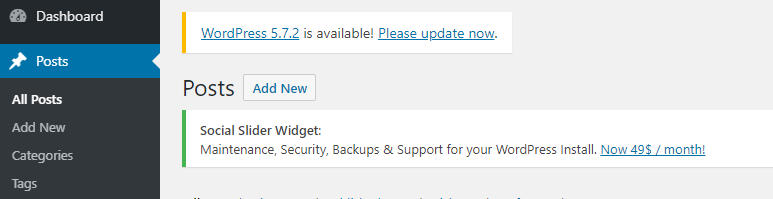
Then click on Add New. Here’s how your screen should look like:
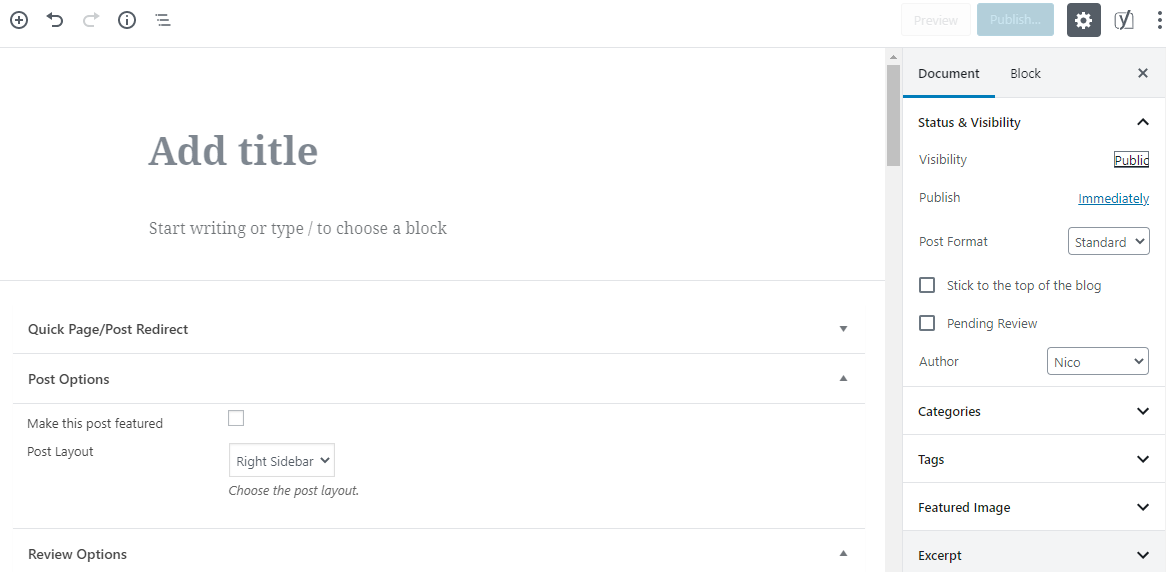
Put in the title in the Add Title field. Then just write away! You can also specify your text alignment, and insert a link, among other things. Just hover your cursor over your text, and you’ll see those options.
You’d have to optimize your post for SEO once it’s done. Just scroll down and you’ll see that SEO section especially if you installed SEO Yoast. Just fill in the blanks. Insert your focus keyphrase, for example.
Include tags, too. You can find that to the right of your screen. Once you’re done, choose a featured image for your post. That’s the image that will accompany that particular blog post on your site.
Then hit publish.
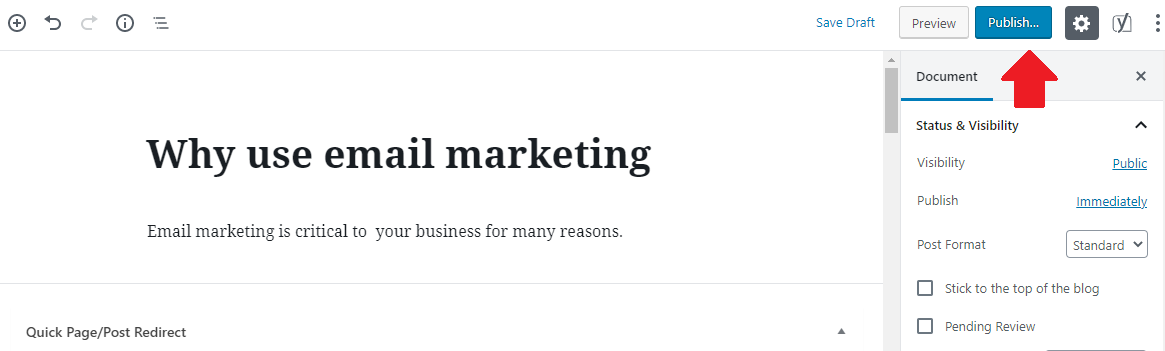
The visibility of your post should be set to Public for it to be live on your site.
If you want to enable comments on your post, just go to Settings on the Dashboard and customize the discussion setup. Read up on other tips to increase engagement on your WordPress website, too.
Wrapping Up
Businesses–whether big or small–should see websites as a requirement to succeed. In the case of online course business, it is no different! Consumers are no longer just looking for solutions to their problems offline. More and more are looking for answers on Google. Without a website, it’s impossible to reach those potential customers.
But how do you build a website in the first place? Nowadays, it’s just that easy. WordPress, in particular, enables just about anyone to create a website even without the knowledge of code. Besides, WordPress is free. So, for as long as you have the Internet, you can just go and download it anytime without shelling out money.
WordPress is easy to use, too. In this article, we shared with you the steps you should follow to create an online course website using the content management system. Just follow them and let those creative juices flow. You’ll have that WordPress website for your business in no time.
Also, check out: